
The Process
In Leadtime, invoices go through clearly defined statuses from checking to payment, reminder or cancellation.
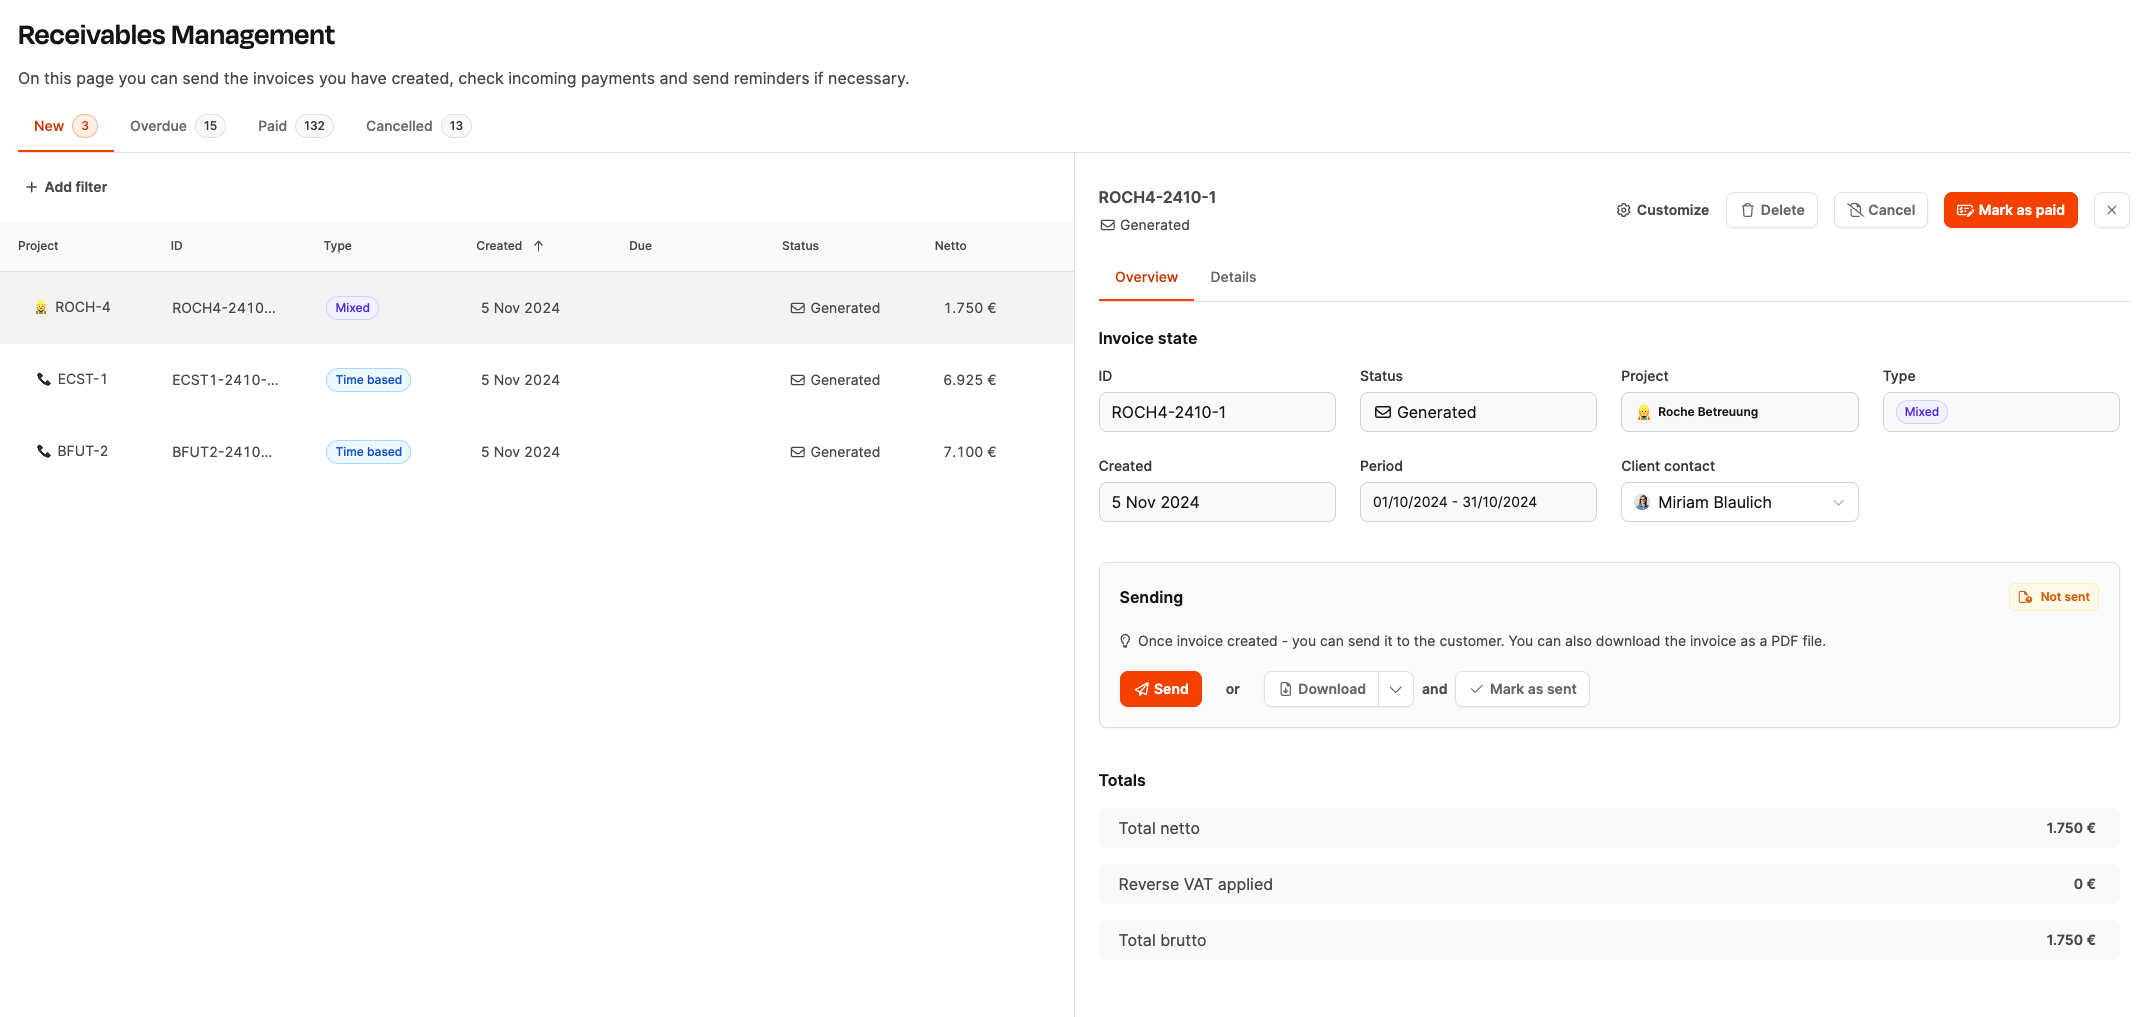
You’ll find the life cycle of an invoice under Billing → Receivables. This is where you control how invoices are generated, sent, tracked and completed. In Leadtime, the process is divided into several status steps so that billing is mapped transparently, comprehensibly and in an audit-proof way.
How it works
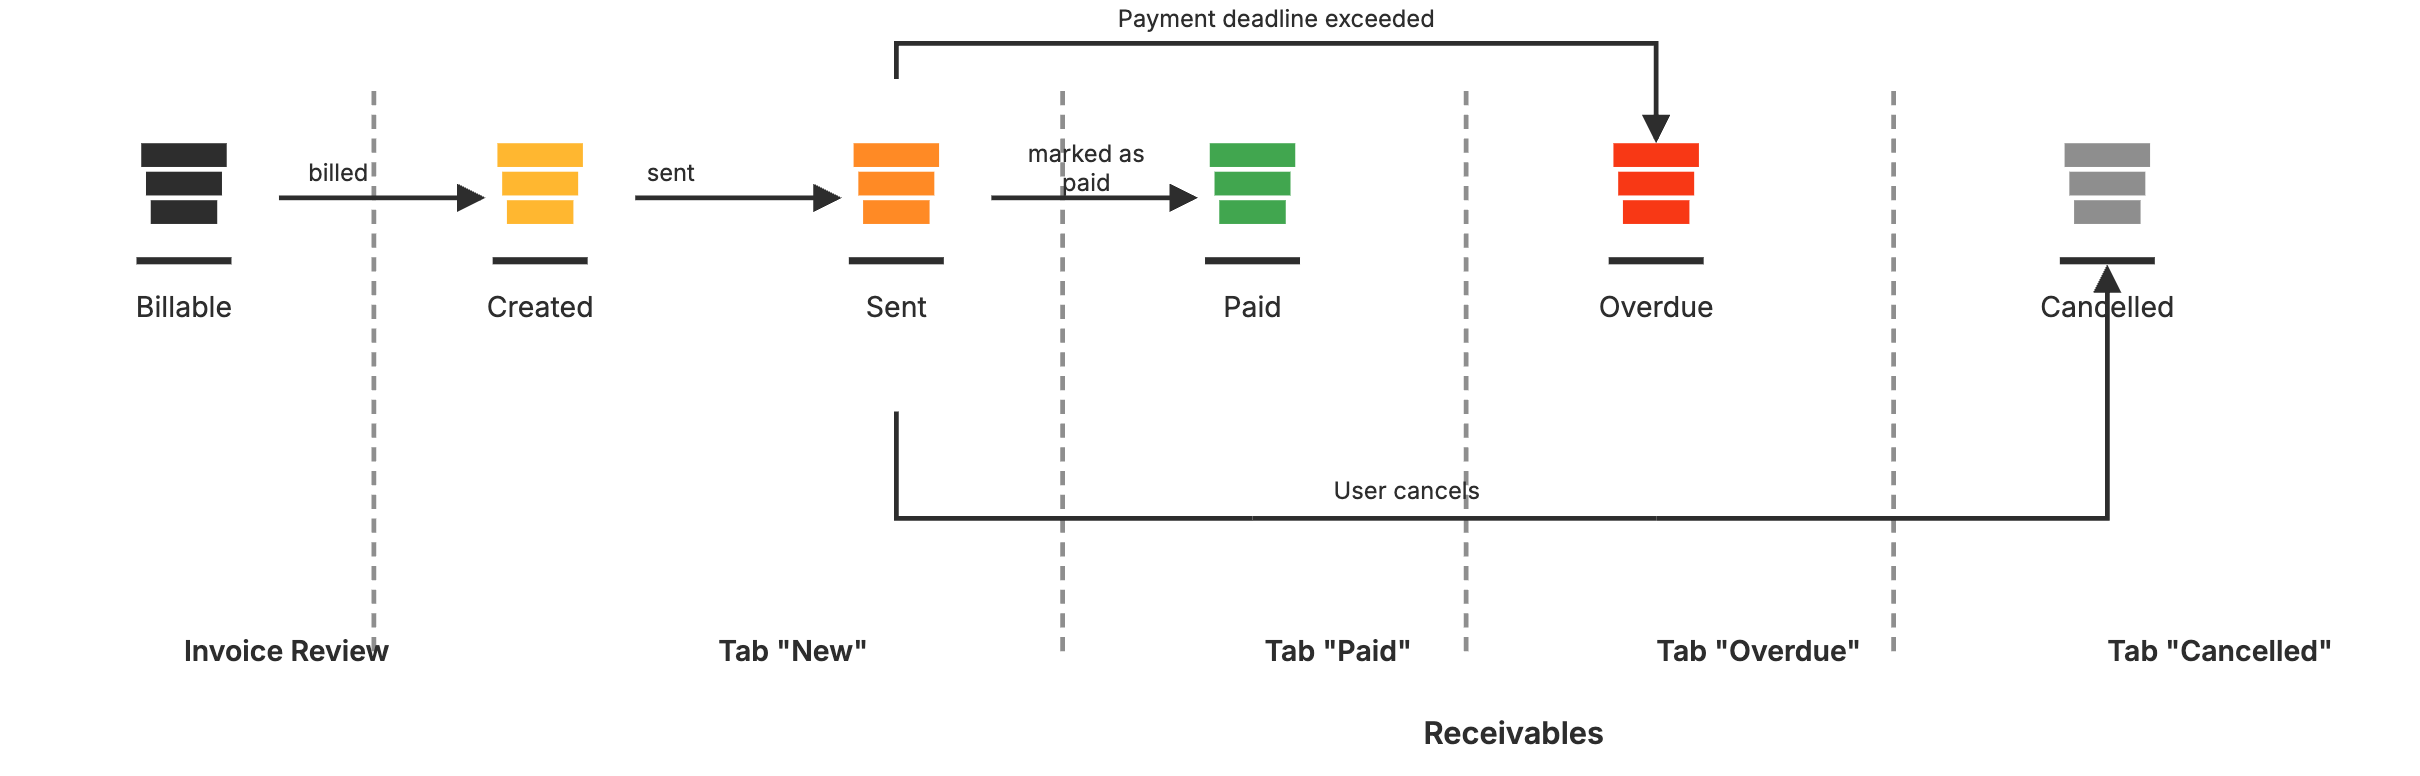
The invoice process in Leadtime is clearly structured and divided into several status steps. Each step is linked to a specific system area and a tab in the Receivables module. The following graphic shows the complete path of an invoice – from the first billing release through to payment, reminder or cancellation.
1. Billable (invoice verification)
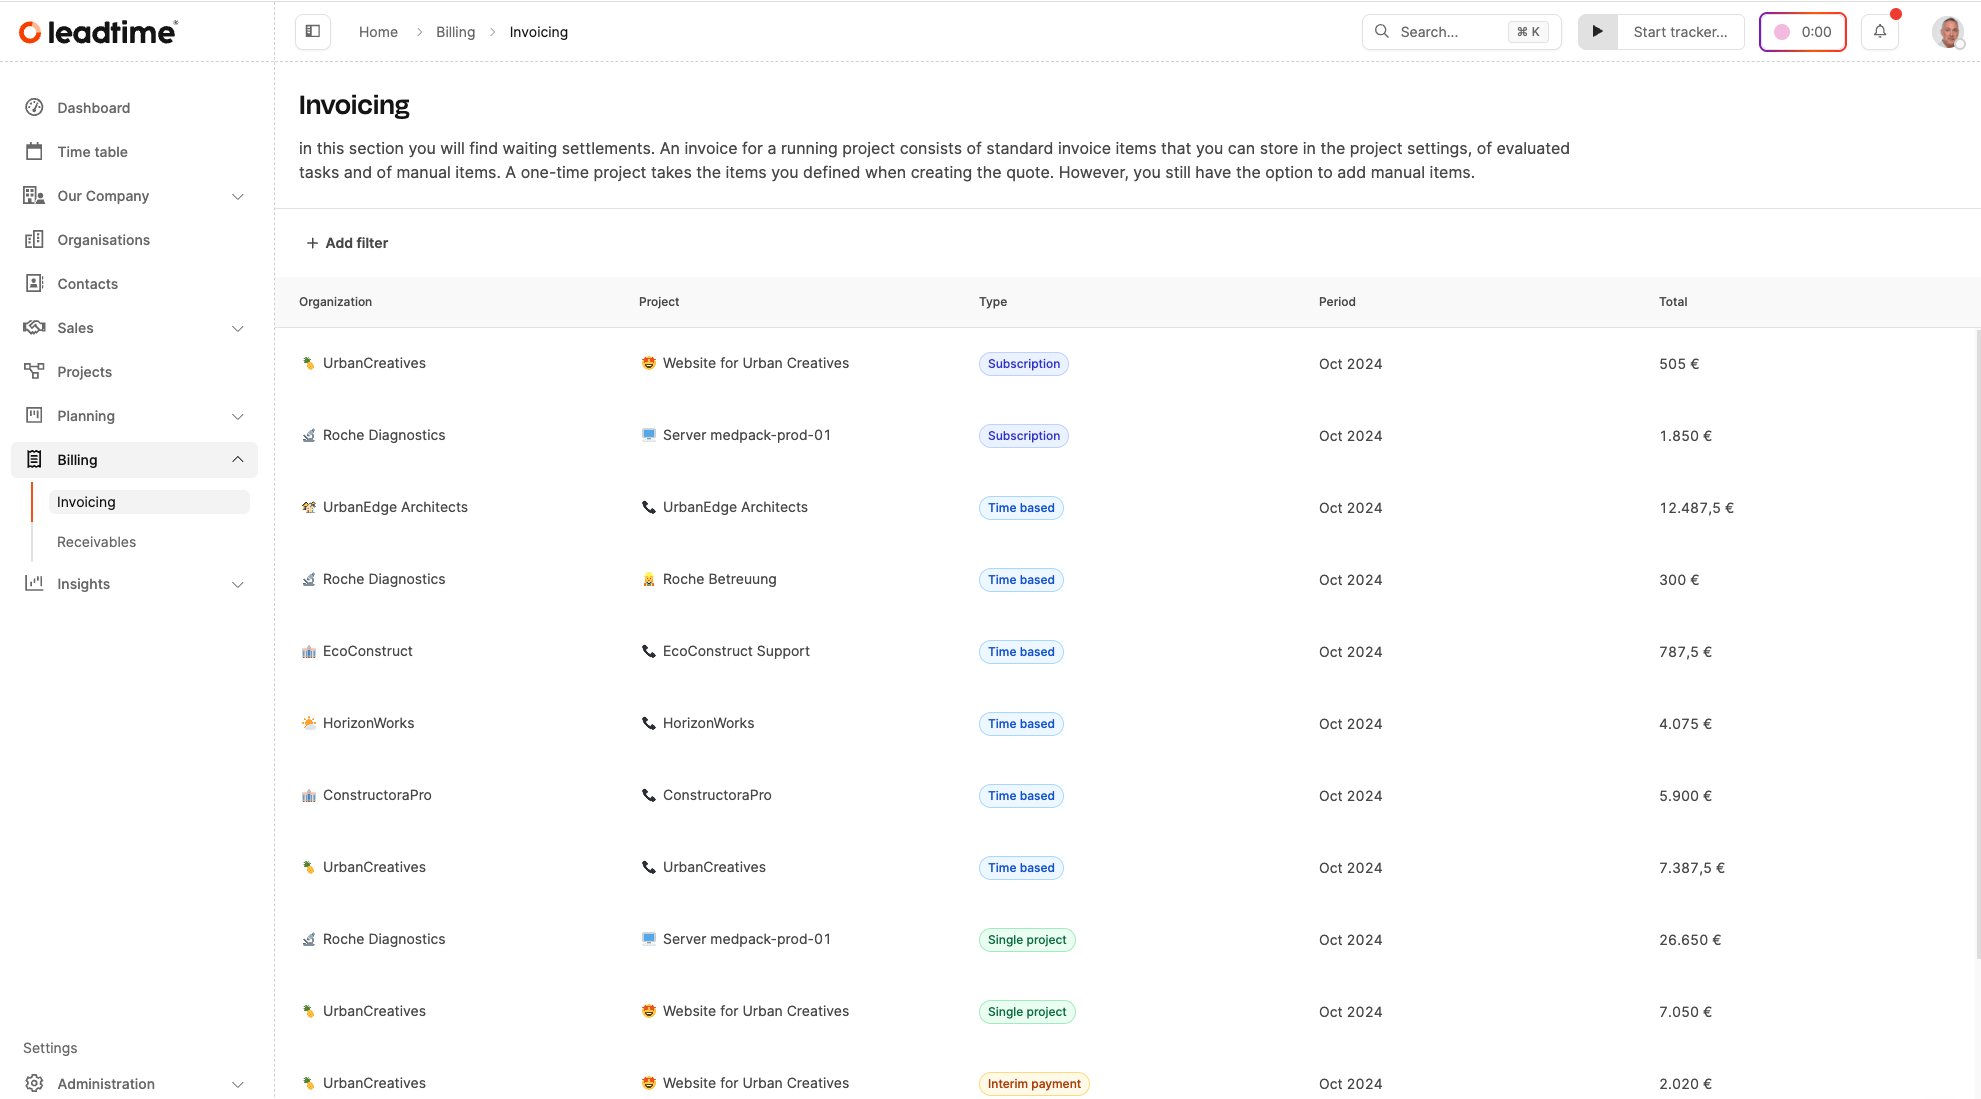
As soon as a project, ticket, product or subscription is ready to be billed, it is proposed in Invoice Verification. Here you can check, change, merge or add items. In this status, the invoice is not yet legally binding.
To Invoice Verification
2. Receivables – New tab
When an item is billed in invoice verification, an official invoice document is created – the invoice is now “Created”. It now sits in the “New” tab of the Receivables module. From this moment on, it can be sent to the customer.
outbox_trayNext step: send the invoice or download it and send it manually.
3. Receivables – New tab / Sent status
As soon as the invoice has been sent or manually marked as “sent”, its status changes to “Sent”. The invoice is now with the customer, the payment term begins to run, and it remains in the “New” tab.
clock4 From here the path leads in two directions – depending on whether and when payment is made.
4. Receivables – Paid tab
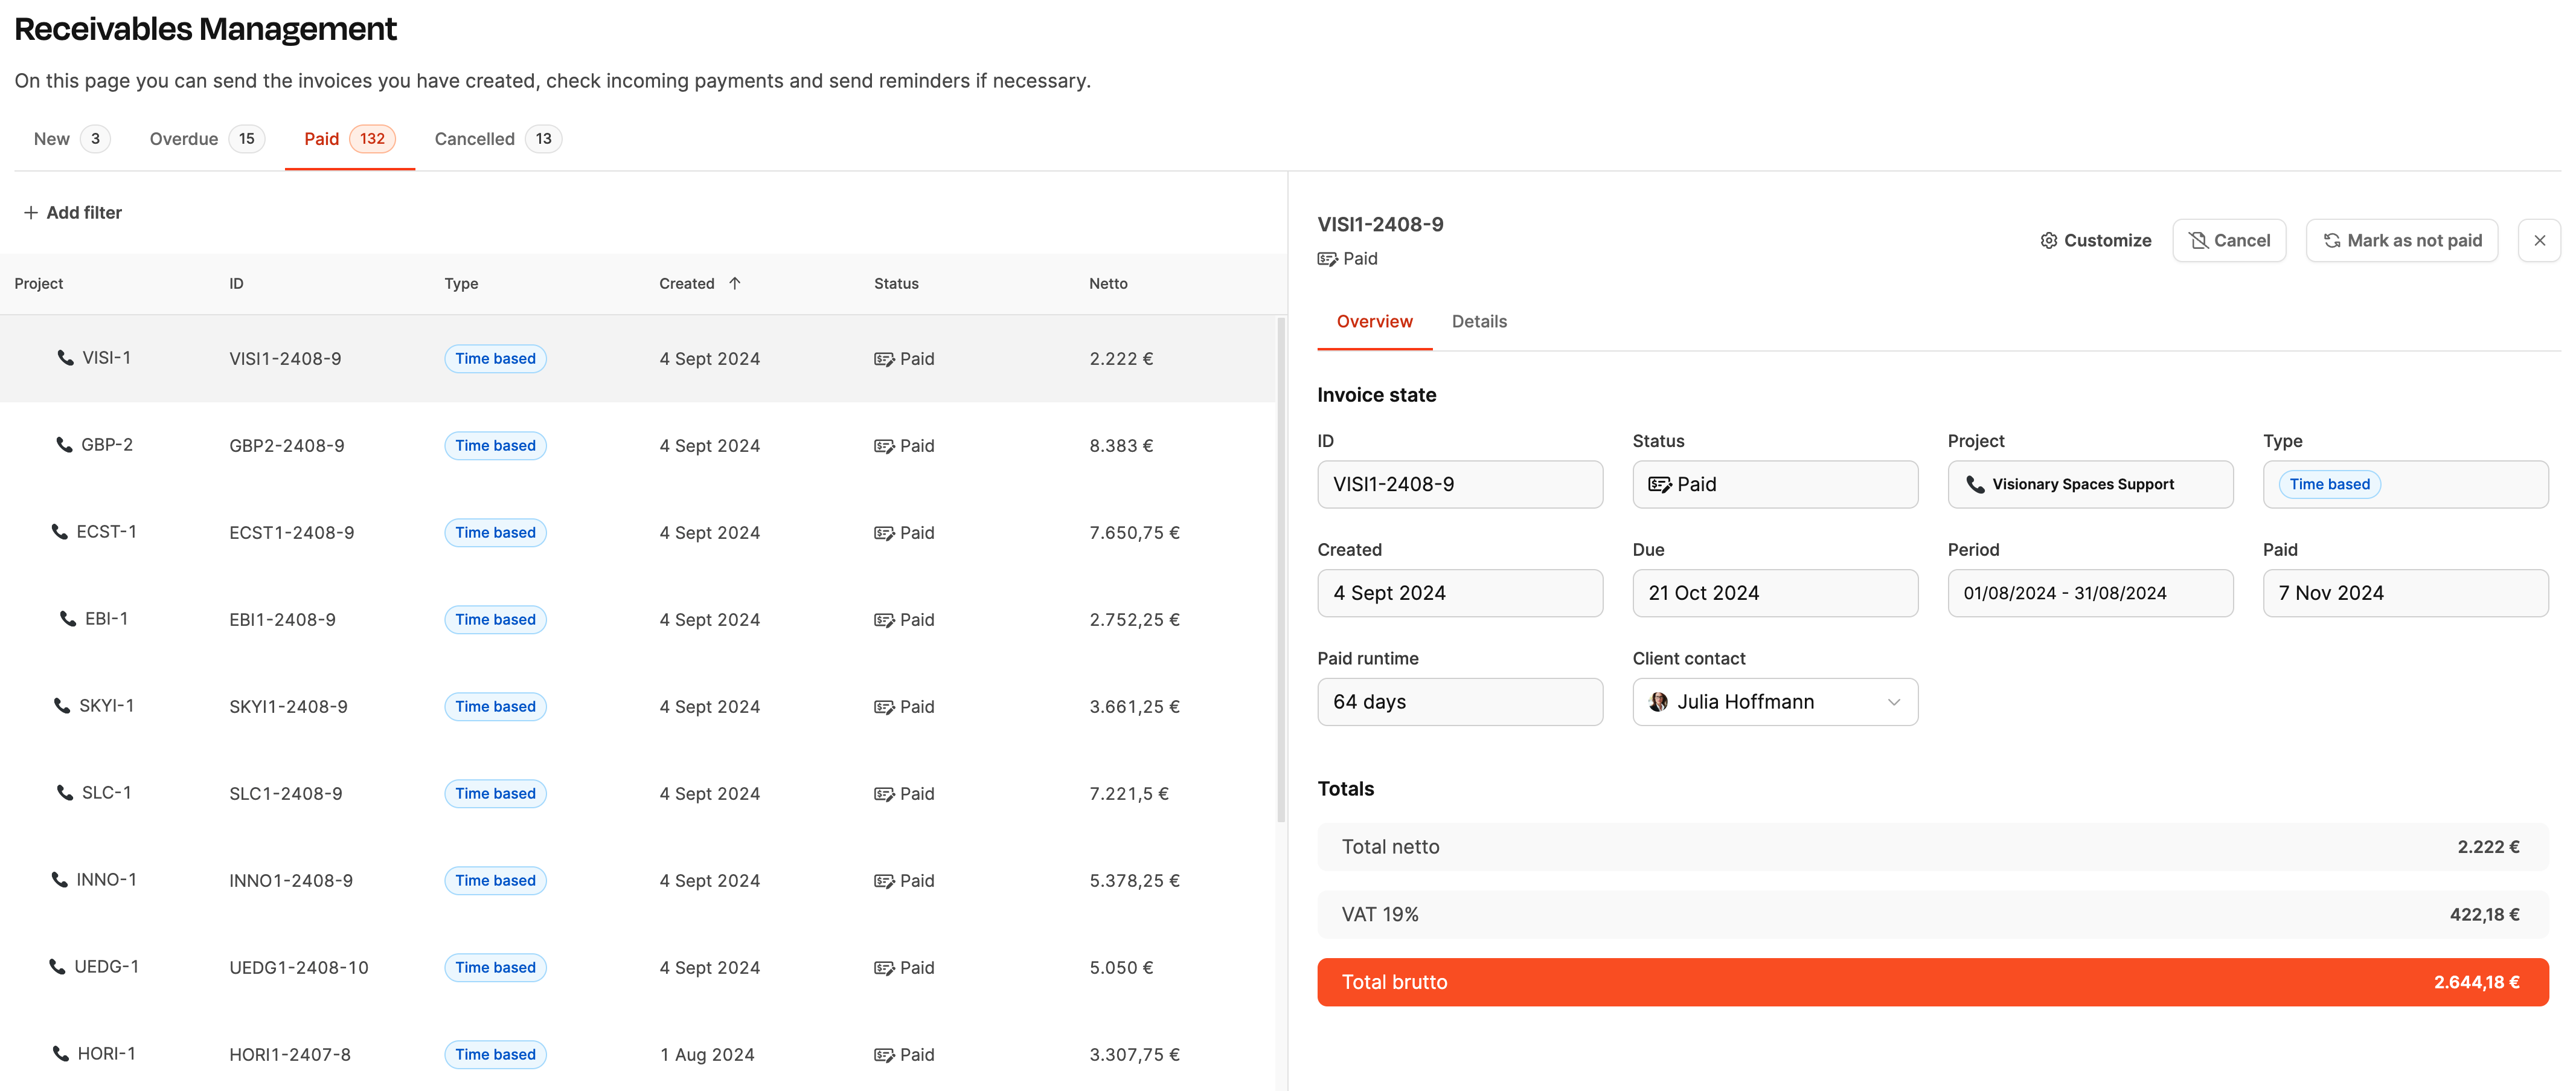
Once payment is confirmed by the customer, the invoice can be marked as “Paid” using the button. It then moves into the “Paid” tab, where all successfully settled receivables are archived.
check_mark_button Payment received and confirmed – process completed.
5. Receivables – Overdue tab
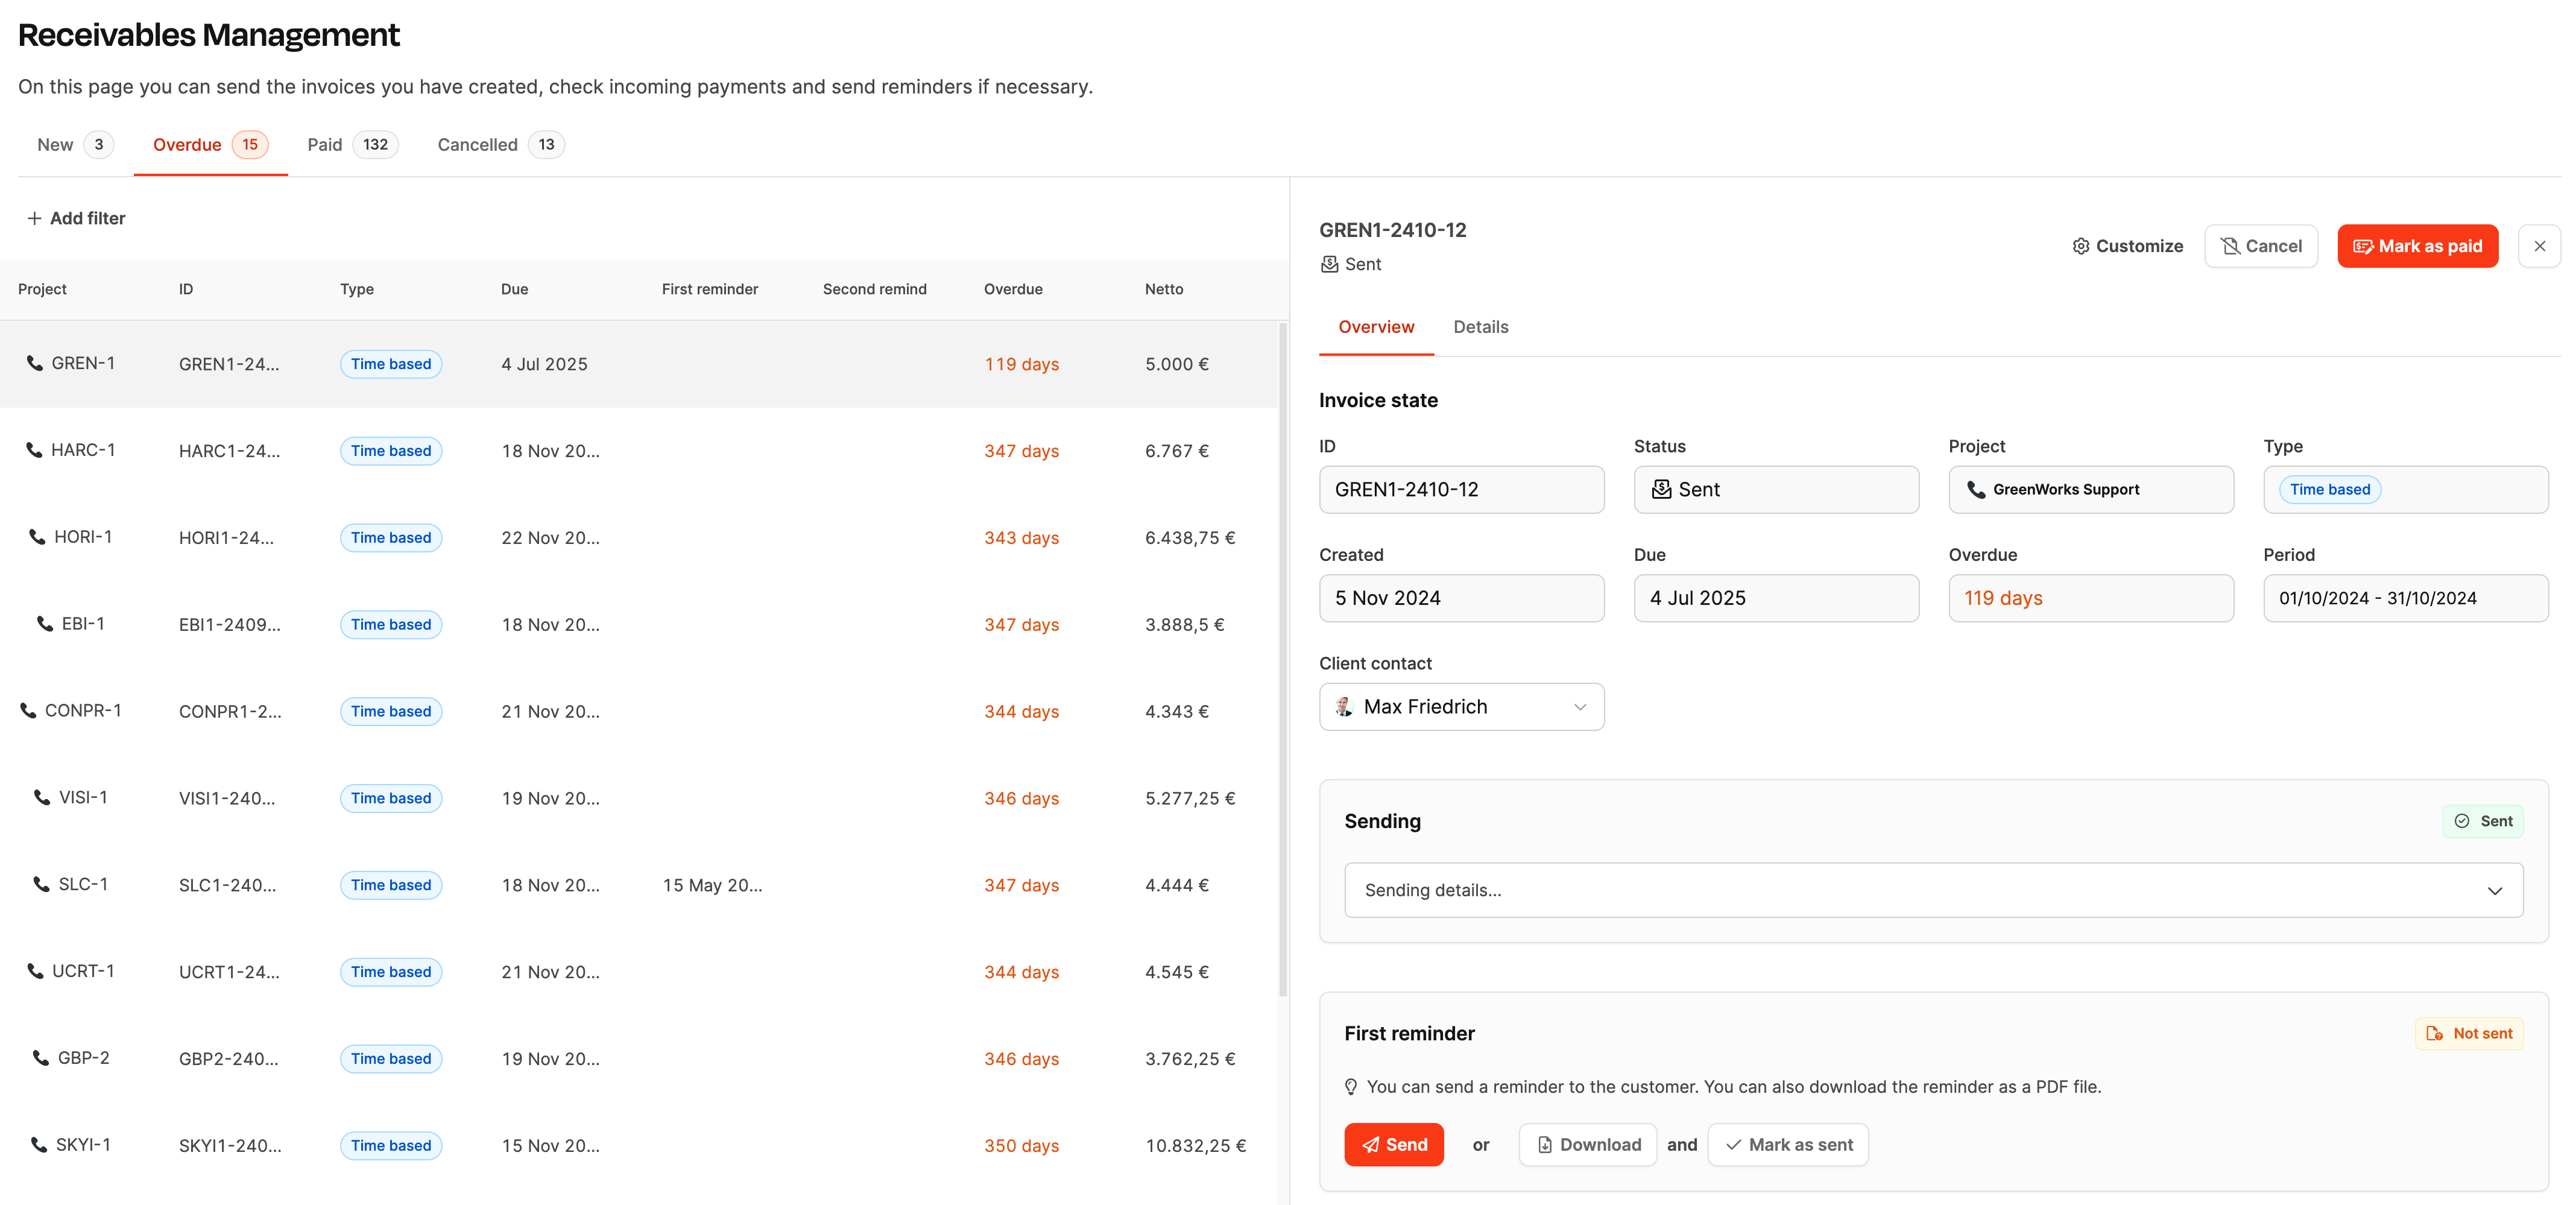
If the payment term is exceeded without an incoming payment being marked, the invoice appears in the “Overdue” tab. This is where the actual dunning process begins: you can send payment reminders or create dunning notices.
6. Cancelled (“Cancelled” tab)
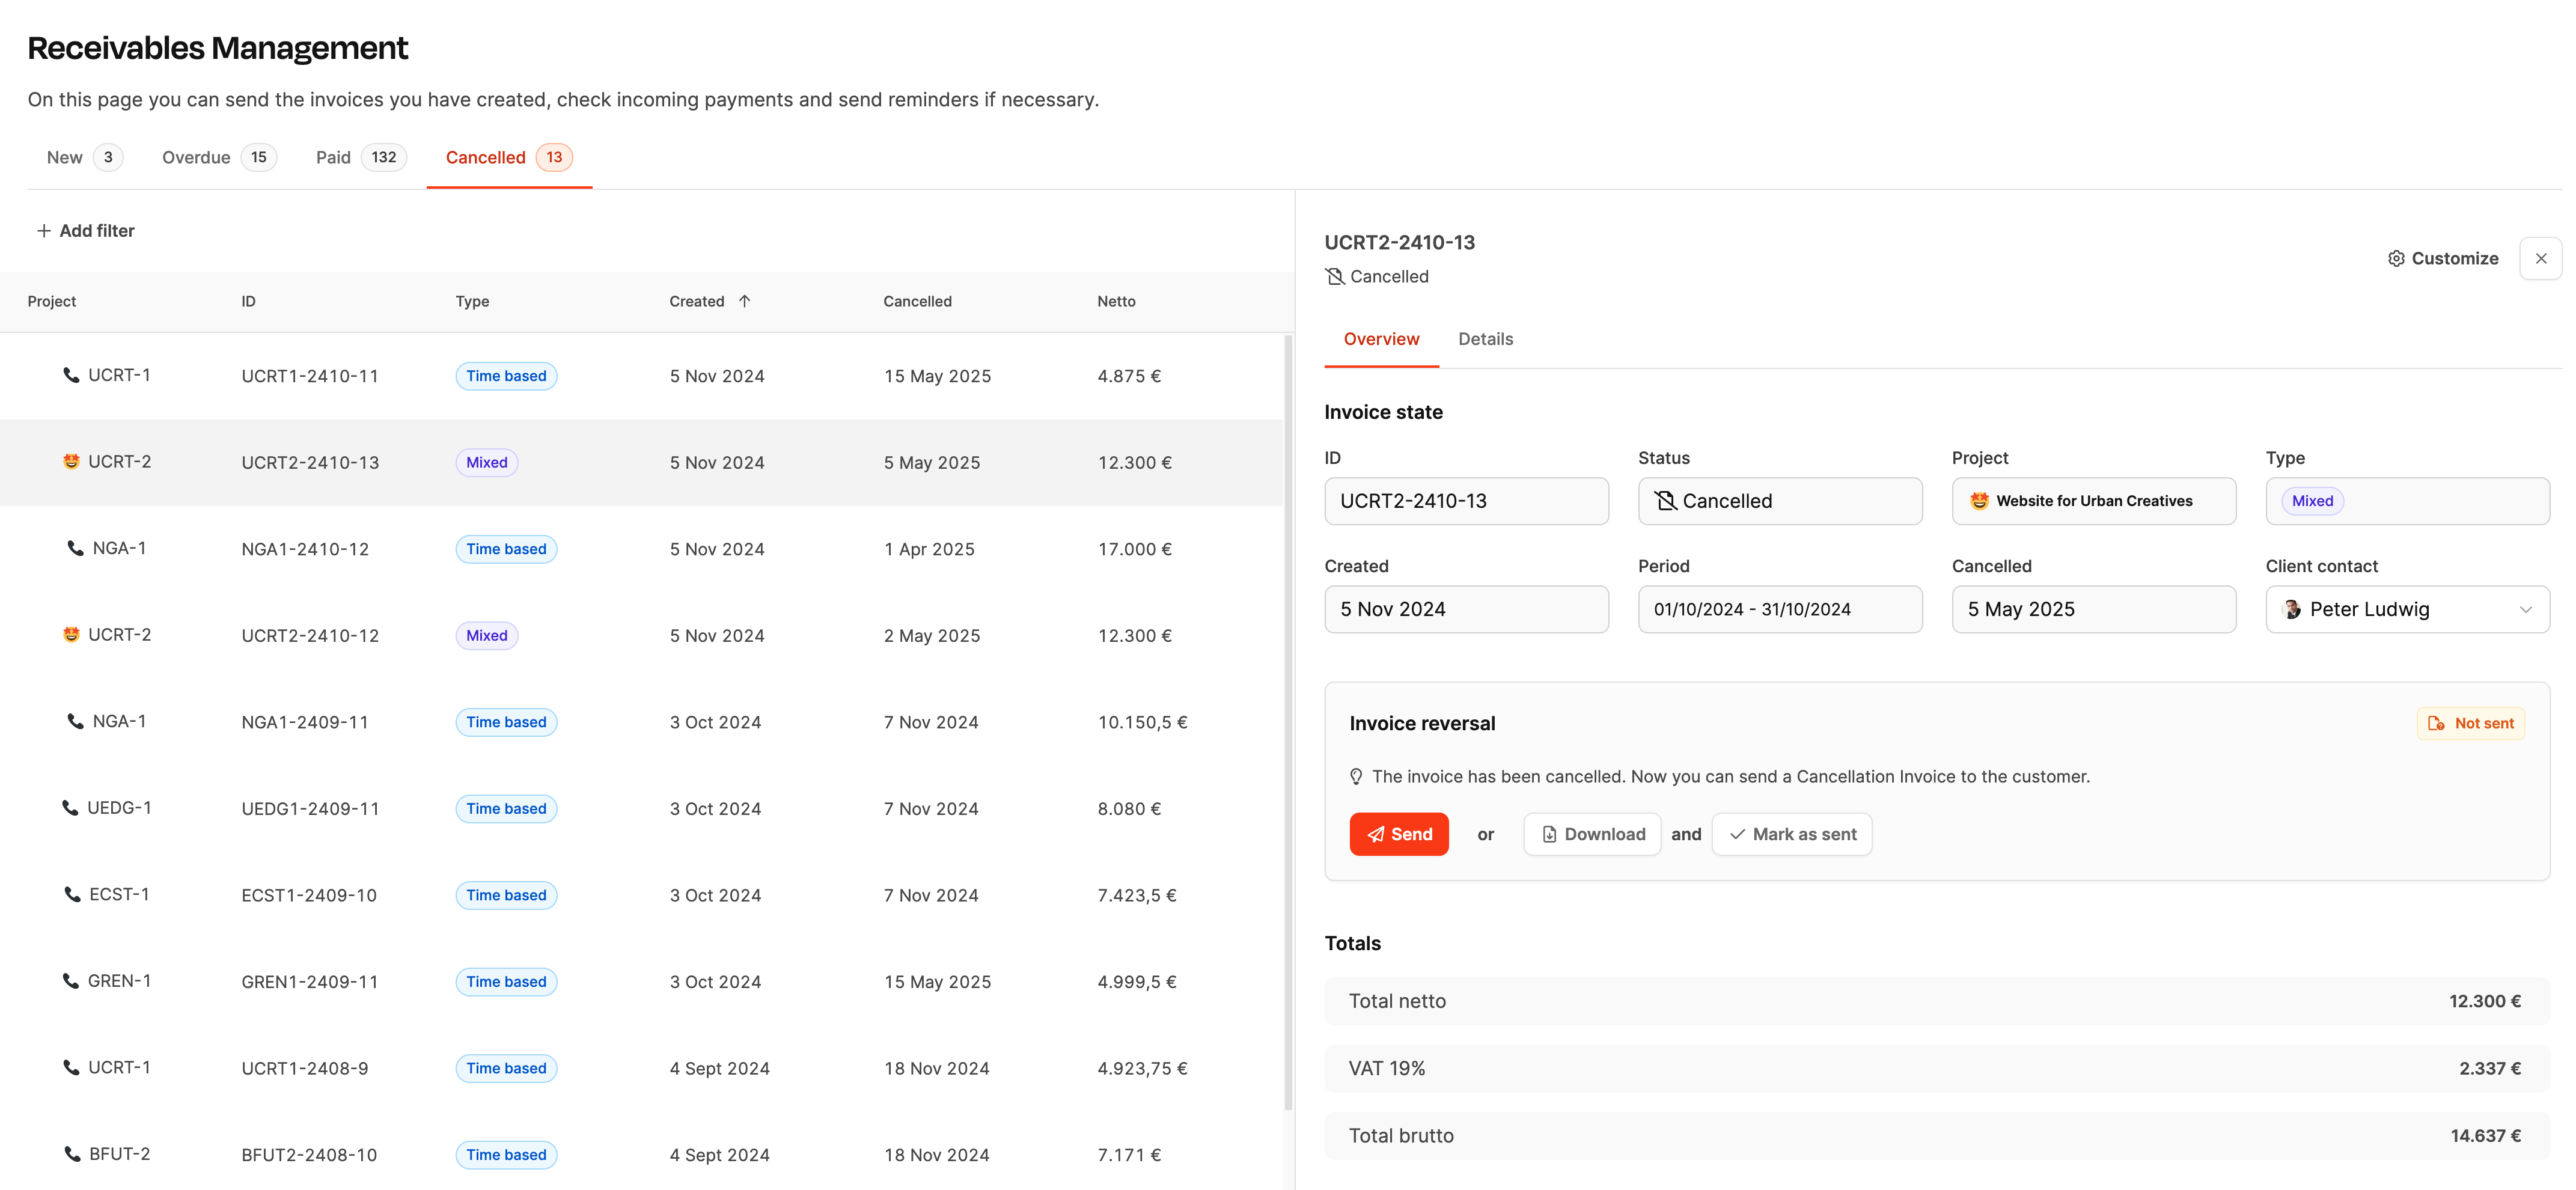
If an invoice is withdrawn for a particular reason (e.g. due to a calculation error, incorrect service or a cancelled order), the user can cancel it. The invoice then moves into the “Cancelled” tab. A new invoice must be created separately – from the original services if necessary. In addition, a negative cancellation invoice is generated during the process.
To Receivables – Cancelled tab
A cancellation resets all invoice items and allows new ones to be created.