
Uploads Tab
The Uploads area manages project-related files centrally, with categories, search, and editing features for organized storage.
The Uploads section is located inside a project and is used to centrally manage project-related files. It lets you store, categorize, and find documents in an organized way, so you don’t have to search through external folders. Typical use cases include contract documents, offers, technical descriptions, or internal notes.
All about projects
How it works
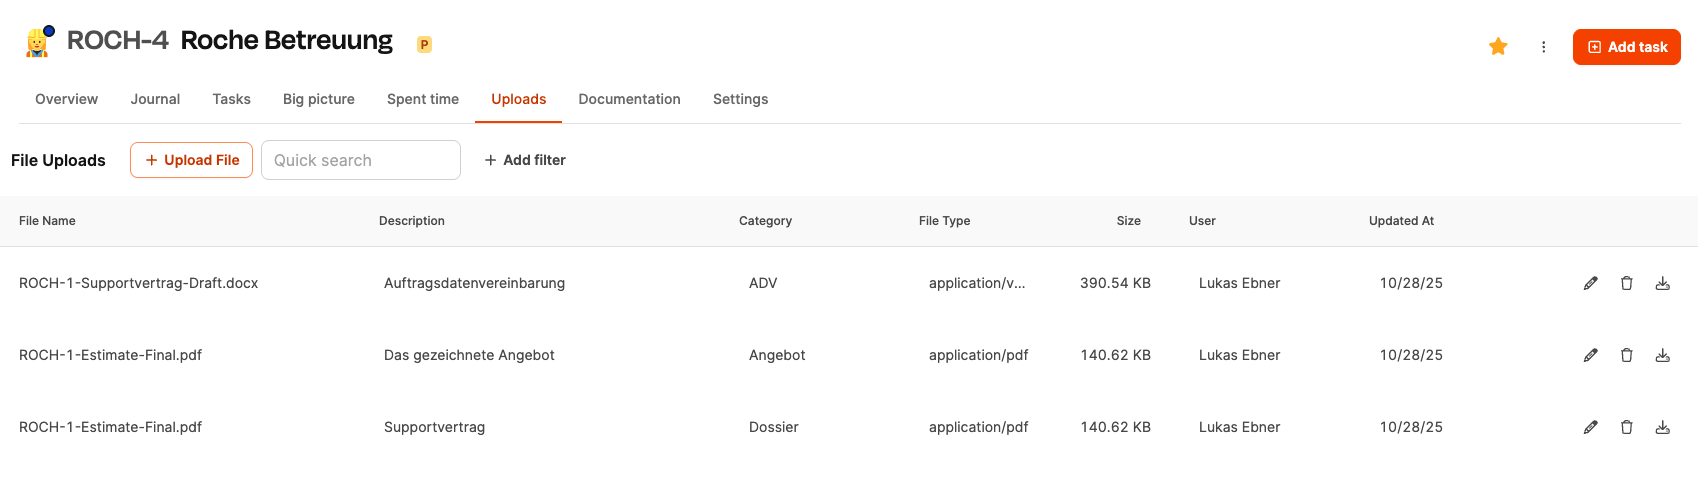
Once you open the tab, all files are shown in a table. The table includes the following info:
- Filename The name of the uploaded file.
- Description A freely formulated text for classifying the content.
- Category A thematic classification, e.g. Contract, Offer or Dossier. Categories can be created as needed.
- File type Technical file format, e.g. application/pdf.
- Size The file size in kilobytes or megabytes.
- User The person who uploaded the file or last updated it.
- Last updated Date of upload or last edit.
There are functions available for each file:
- Edit (pencil icon) Changes description, file name or category.
- Delete (trash can) Removes the file from the project.
- Download Downloads the file locally.
Upload files
In the upload dialog you’ll find these fields:
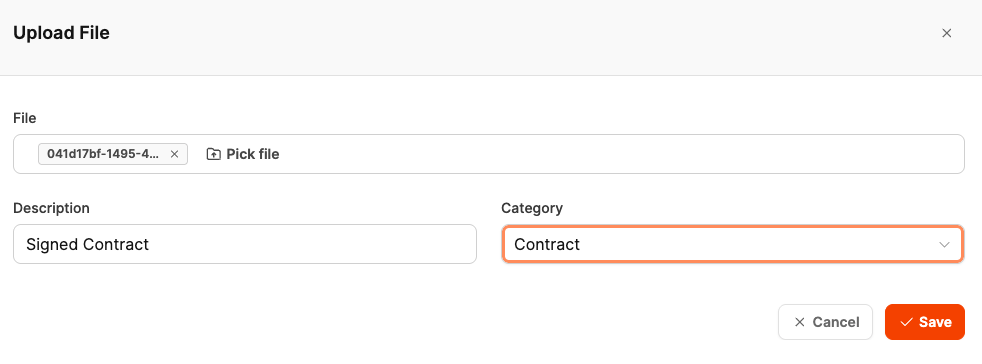
- File Select a file from your device. After uploading, the file name will show up automatically.
- Description Free text field for a short explanation. It’s best to use clear wording like: - “Signed contract 10/28/2025” - “Kickoff protocol” - “Technical specification v2”
Category
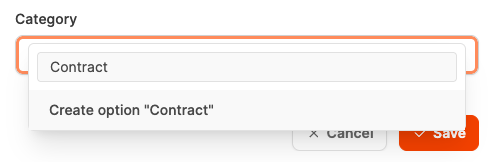
Every file should be assigned to a topic category (e.g. Contract, Documentation, Dossier). Categories help with filtering, sorting, and finding files.
The category selection works dynamically:
If you enter a term that doesn’t exist yet, you’ll see an option to create a new category during upload. This way, teams can react flexibly to project specifics without needing to change central definitions ahead of time.
After entering all the info, you’ve got two actions to choose from:
- Cancel Closes the dialog without saving any changes.
- Save Uploads the file and puts it in the project area.
A newly created category is immediately available for future uploads.
All about projects