
Create a new component
The two views of the Component Library and how to create a new component
Found under Administration → Component Library
The Component Library in Leadtime is the central repository for reusable project building blocks.
It is where you maintain standardized structures, work packages, checklists, and tests that serve as the basis for new projects.
This allows similar projects to be prepared, calculated, and delivered efficiently without starting from scratch each time.
About project components
How to use project templates in projects: Project planning – project tree
Overview and views
The library provides two main views for organizing and navigating content:
| View | Description |
|---|---|
| Grid view | Displays all existing components in a table. Ideal for quickly searching, filtering, and categorizing a large collection of components. |
| Tree view | Displays the internal structure of a component as a hierarchy—with parent Epics and subordinate work packages, checklists, and acceptance tests. This view is used to edit and structure content. |
Grid view
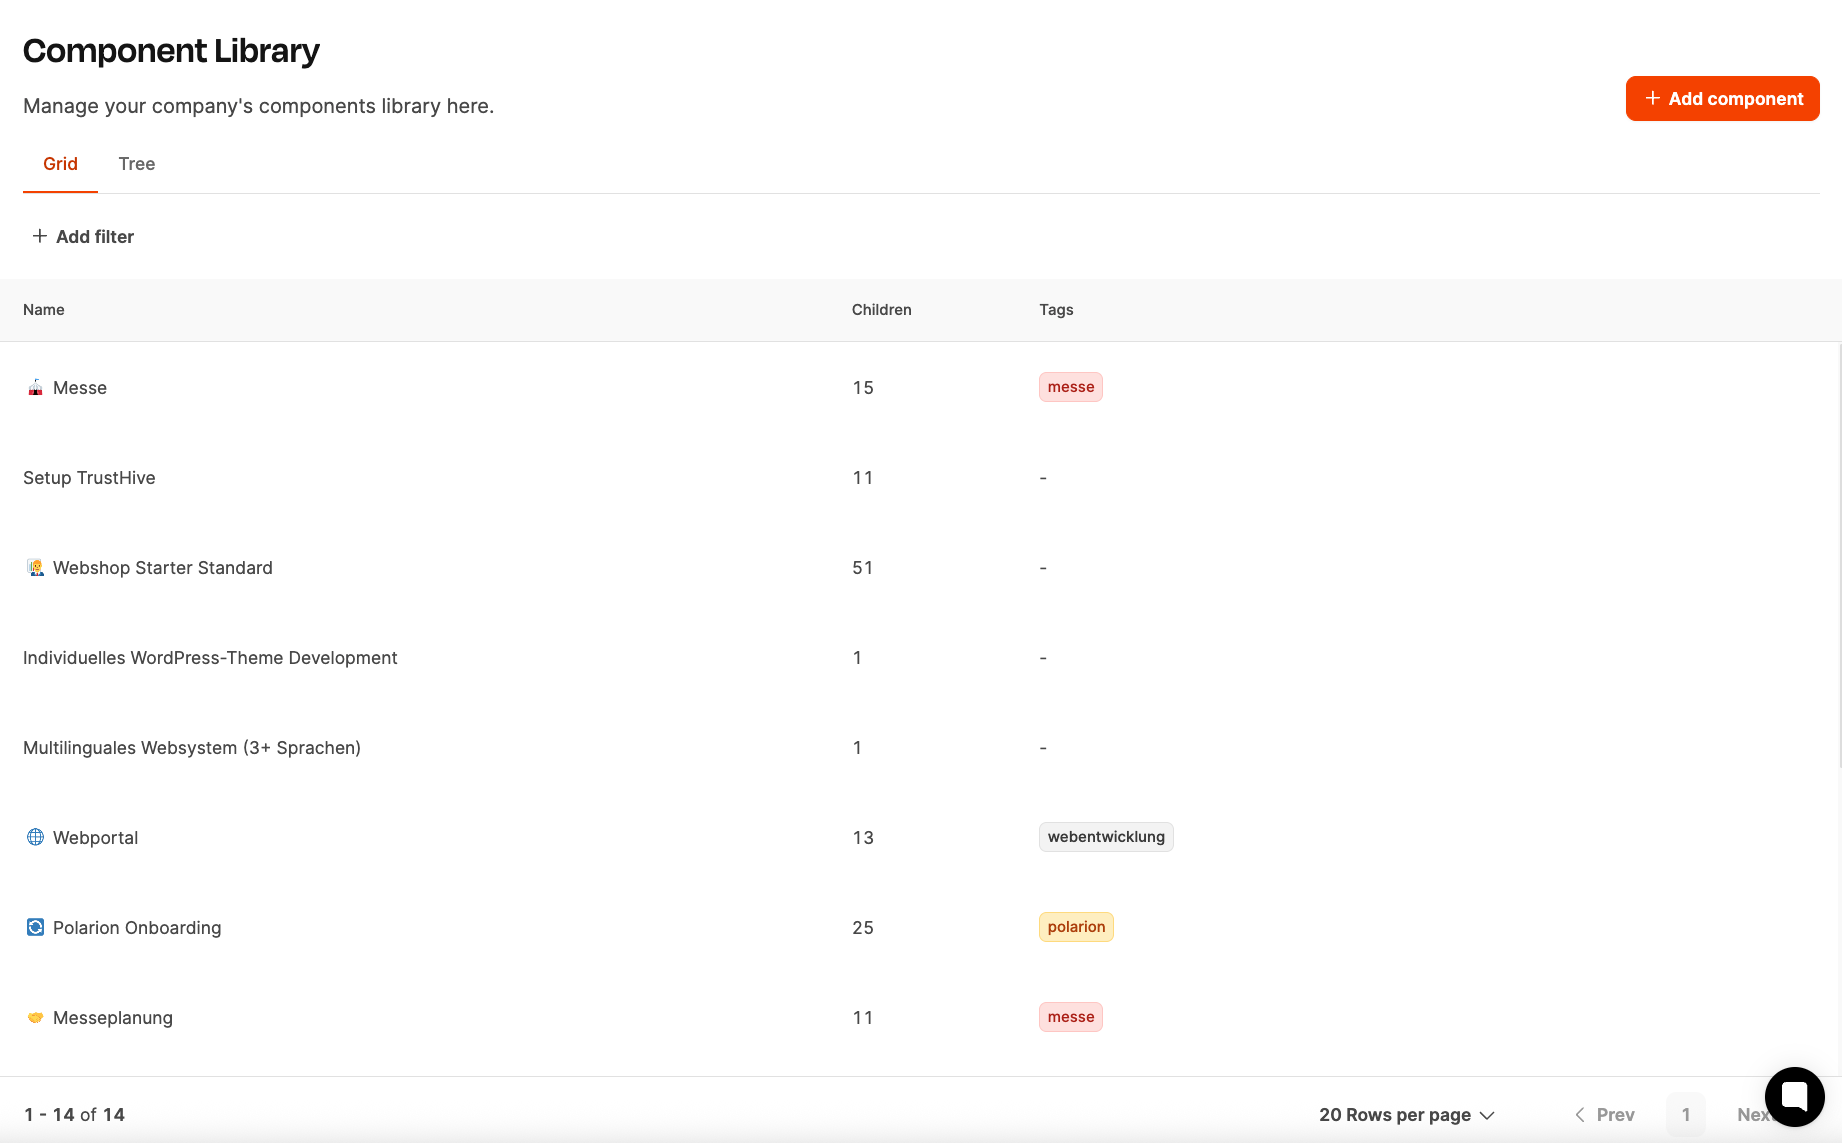
The grid view of the Component Library provides a compact table overview of all project components in the system.
It is primarily used for quick orientation, filtering, and administration when managing a large number of components.
Each row in the table represents a single project component.
The most important information is shown at a glance:
| Column | Description |
|---|---|
| Icon / Name | The component’s name and icon. The name describes the project type or use case (for example, Trade show or Webshop Starter Standard). |
| Children | The number of subordinate elements it contains (for example, Epics, work packages, checklists, or tests). This number indicates the size of the component’s structure. |
| Tags | Keywords used to categorize the component (for example, trade show, web development, or polarion). Tags make searching and filtering easier and are automatically carried over when tickets are generated. |
The total number of existing components is displayed at the bottom. You can browse the list using pagination (for example, 20 Rows per page).
Add Component (+): Use the orange button in the top right to create a new component. Once it has been created, you can continue structuring it in the tree view.
Add Filter: Use this option to filter components by name, tags, or other attributes. This is particularly helpful when the library contains many building blocks.
Sorting: The list can be sorted by name, number of Children, or tags. This makes it easier to find extensive or frequently used components.
Tree view
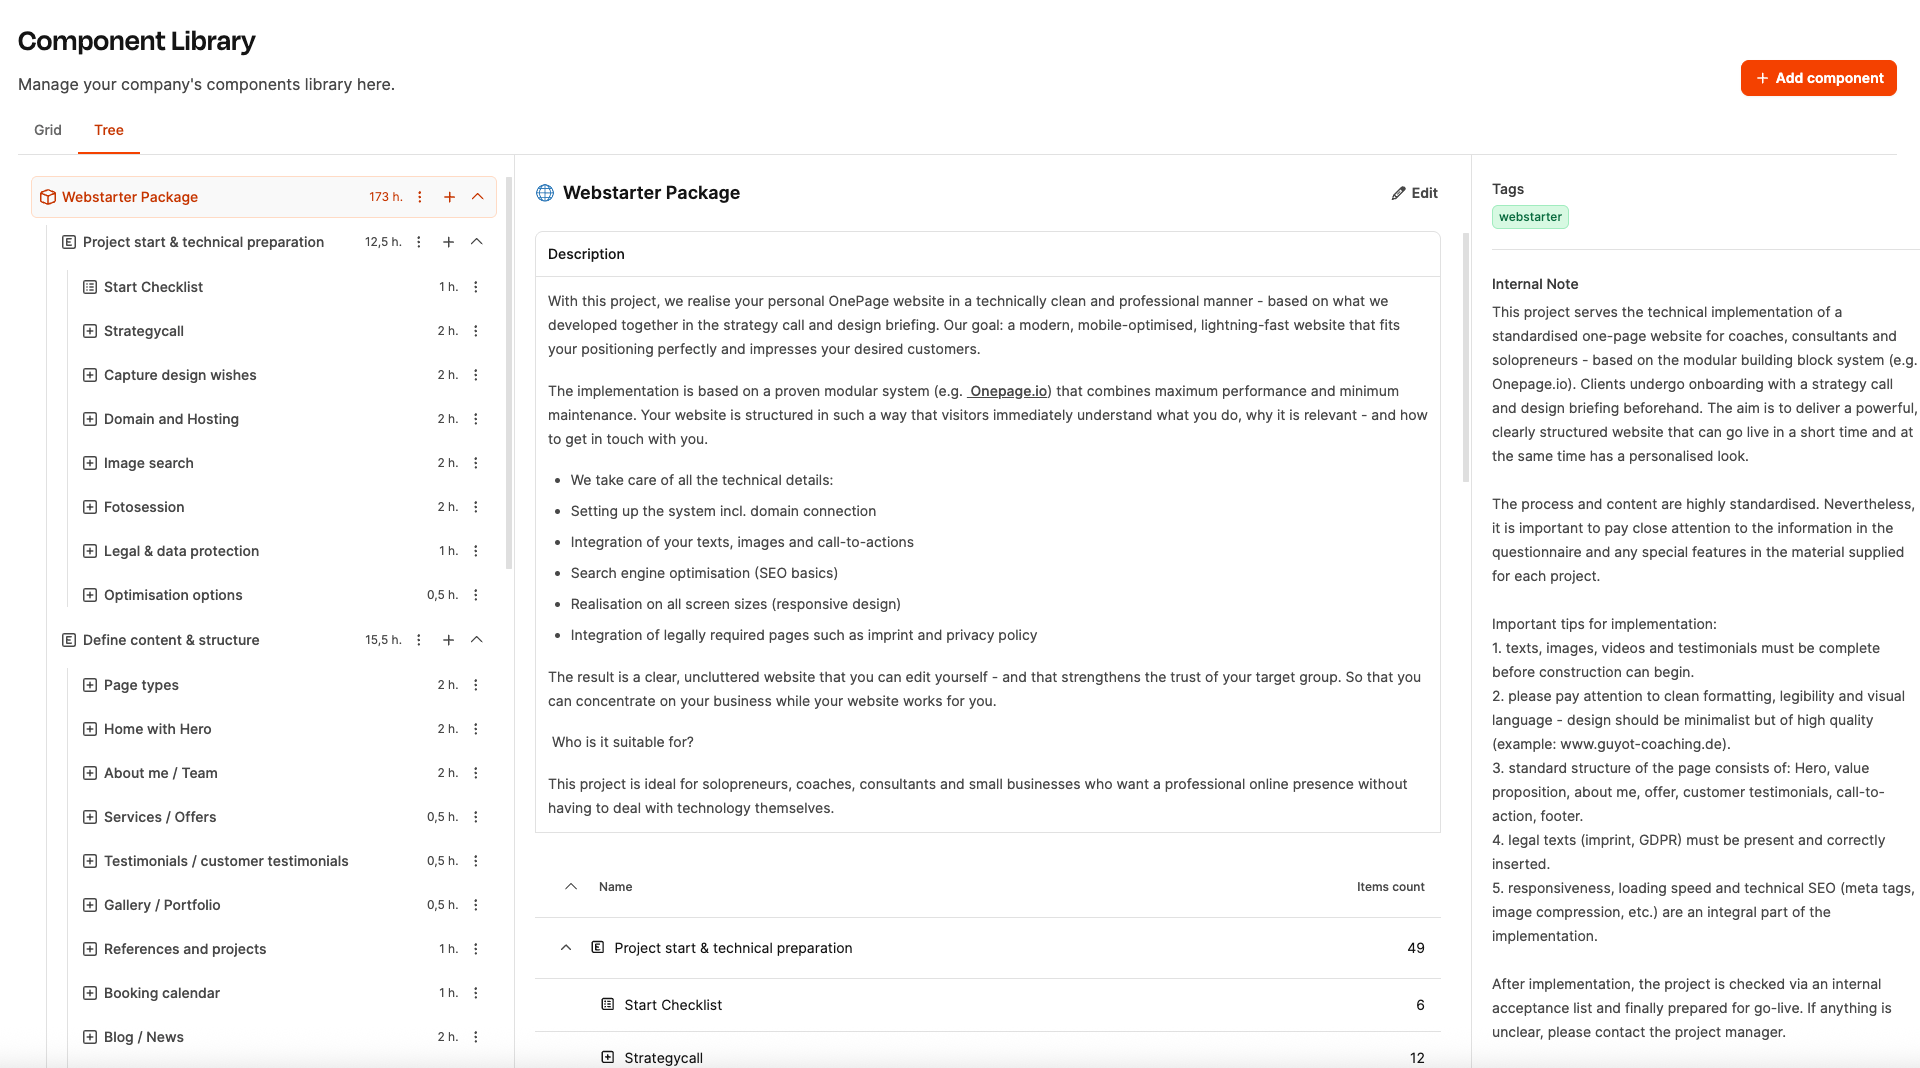
The tree view of the Component Library is used to display and edit individual project components in a structured way.
Complex project templates are built here as a hierarchy of Epics, work packages, checklists, and acceptance tests.
Use this view to organize content, identify dependencies, and define the sequence of work packages.
The tree view is divided into three areas:
| Area | Description |
|---|---|
| Left column (structure tree) | Shows the component’s hierarchical structure. Parent Epics can be expanded to view their work packages, checklists, or tests. |
| Middle column (Description) | Contains the publicly visible project description. It explains what the component delivers, who it is intended for, and which tasks it includes. |
| Right column (Tags & Internal Note) | Used for internal organization. Tags categorize the component by topic, while internal notes contain guidelines, standards, or project instructions. |
Types of building blocks in the Component Library
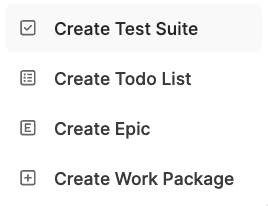
Four different types are available when creating new building blocks:
| Element | Description |
|---|---|
| Epic | A parent section, such as “Project kickoff & technical preparation” or “Design.” Used to divide the project into logical phases. |
| Work Package | Contains specific tasks and optional questionnaires used to calculate effort and price. |
| Checklist | A collection of to-dos or checkpoints that must be completed before the next step. |
| Test Suite | Final tests or acceptance criteria that document the successful completion of the project. |
Use the plus icon (+) to add new elements at any level at any time.
The building blocks of project components
Create a new component
Use the “Add new component” dialog to create a new project component in the Component Library.
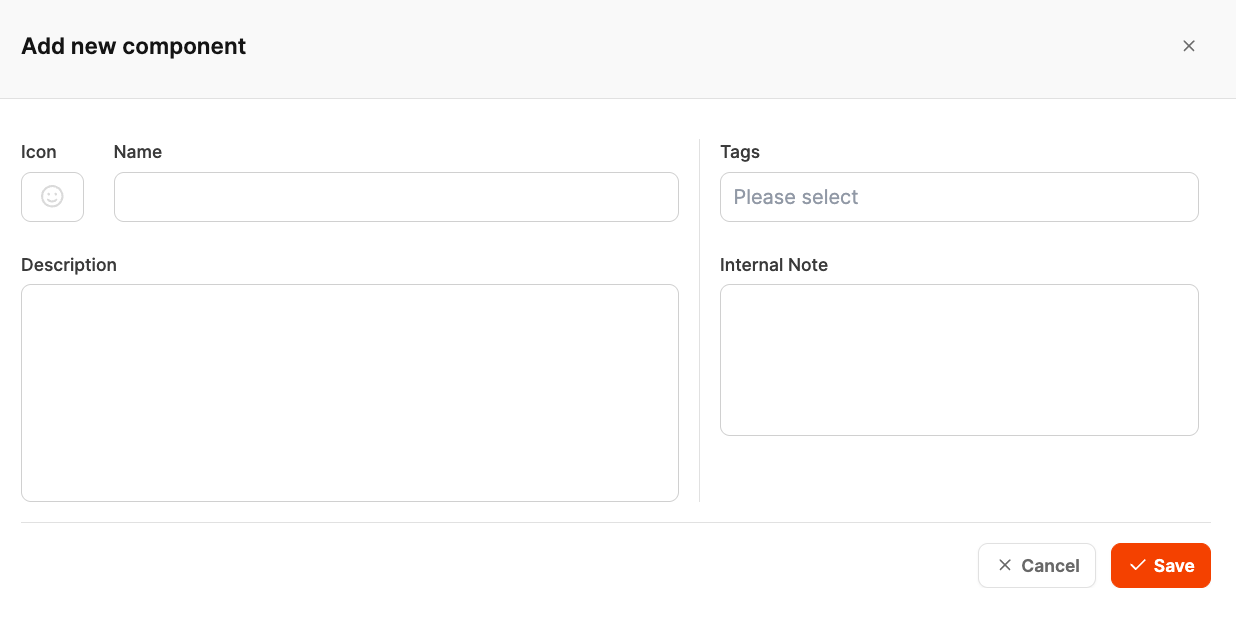
The form contains the following elements:
| Field | Description |
|---|---|
| Icon | Select an appropriate icon to represent the component visually. Icons make components easier to identify quickly in the grid and tree views. |
| Name | Enter the component title, such as “Webstarter Package.” The name should clearly describe the project type. |
| Tags | Select or create keywords for categorization (for example, web development, marketing, or consulting). These tags are automatically passed to tickets generated from this component. Use of Tags in Project Components |
| Description | Describe the component from the customer’s perspective. Explain its purpose, the services it includes, and who it is suitable for. This text can be used in quotes or presentations. |
| Internal Note | Record internal guidance for the project team, such as technical standards, implementation instructions, quality guidelines, or special requirements. This information is visible only internally. Internal Notes |
Procedure
- Open the grid or tree view in the Component Library.
- Click the orange “Add component” button in the top right.
- Enter the required information in the Icon, Name, Description, Tags, and Internal Note fields.
- Confirm your entries with “Save” to save the new component.
- Once saved, you can add more building blocks (Epics, work packages, checklists, and tests) in the tree view.
Best practices
- Use clear, descriptive names so components are easy to find.
- Use consistent tags so components can be filtered systematically.
- Write the Description so that customers or external partners can understand it.
- Use the Internal Note to record internal process details (for example, important documents or technical specifics).
How to use project templates in projects: Project planning – project tree