
E-Mail Accounts
In this section, you set up the email accounts that Leadtime uses to send, receive messages, and handle helpdesk requests. Connections to Google, Microsoft 365, or IMAP accounts can be tested and managed here.
Manage email accounts
Found under Administration → Workspace Settings → Email Accounts
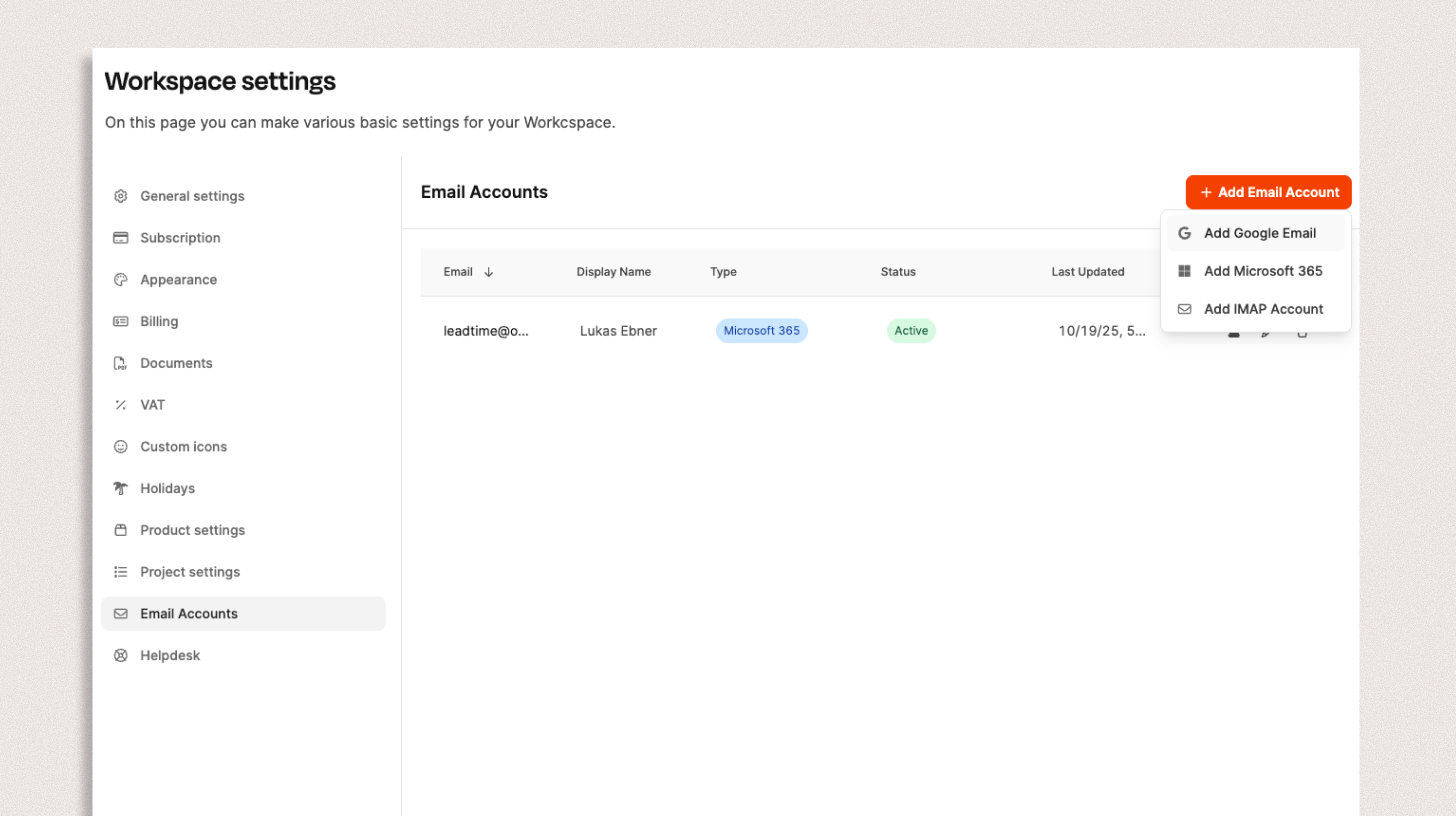
In the Email Accounts section, you set up the mailboxes through which Leadtime can process helpdesk workflows. The system supports common providers such as Google Workspace, Microsoft 365, and traditional IMAP mailboxes.
Go to the Helpdesk
Add an email account
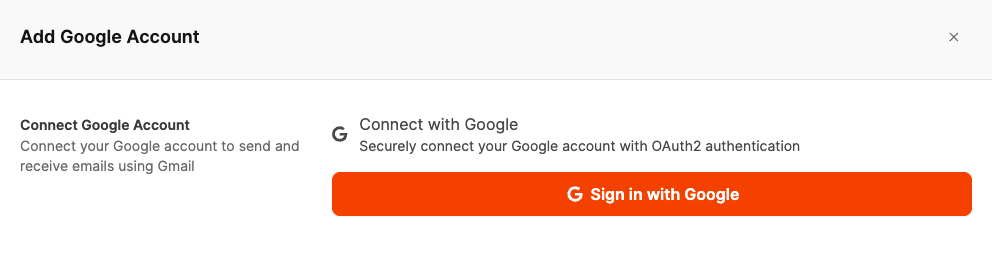
Click + Add Email Account to connect a new account.
Choose whether it is a Google, Microsoft 365, or IMAP mailbox.
Depending on the provider, you will be redirected to the corresponding sign-in page to grant Leadtime access to the account.
Connect IMAP accounts
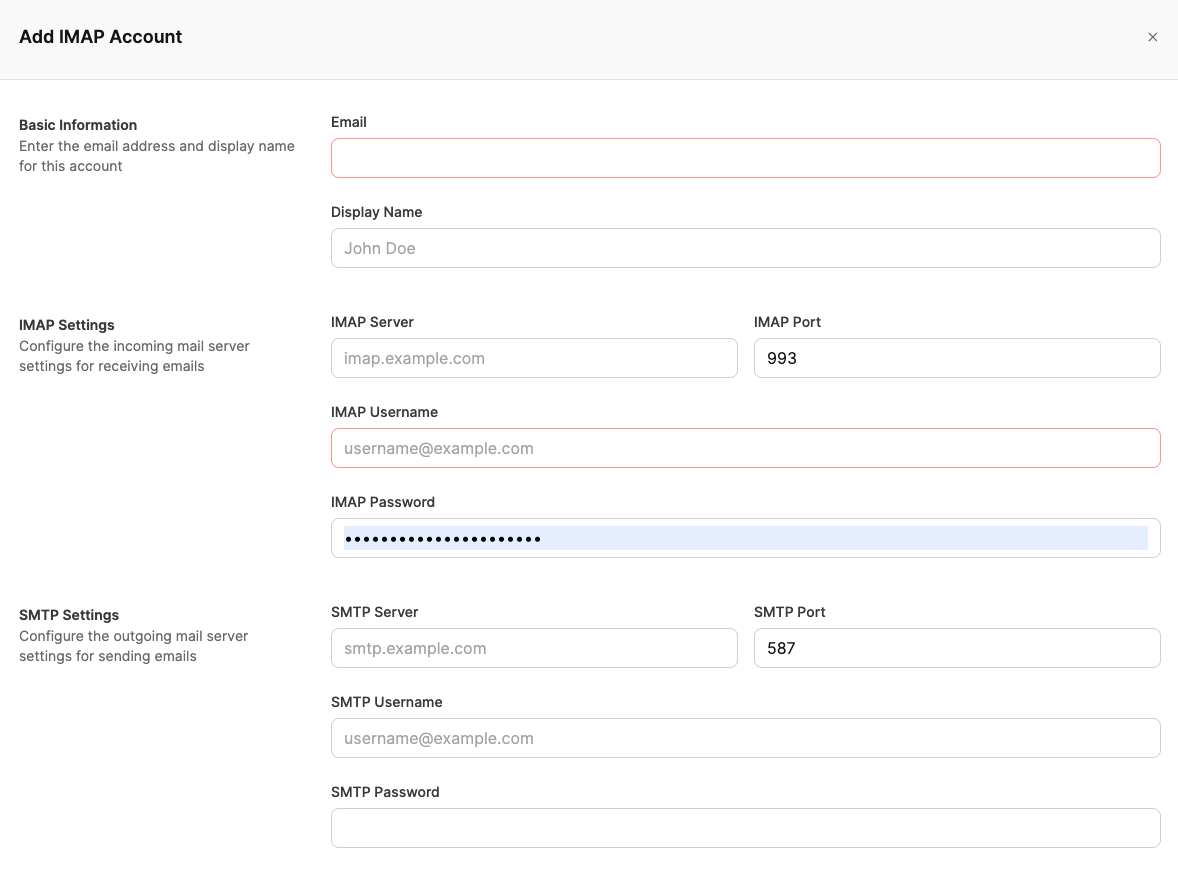
If you do not use a Google or Microsoft 365 account, you can also connect your mailbox via IMAP. This option is suitable for traditional mail servers or self-hosted mailboxes.
To set up an IMAP account, click + Add Email Account → Add IMAP Account.
A dialog opens where you can enter your mail server connection details:
1. Basic information
- Email address: The mailbox’s full address, e.g. lukas@leadtime.de
- Display name: The name shown on outgoing messages.
2. IMAP settings (incoming email)
- IMAP server: Address of the incoming mail server, e.g. imap.example.com
- IMAP port: Usually 993 (SSL/TLS)
- IMAP username: Usually identical to the email address
- IMAP password: The mailbox password
3. SMTP settings (outgoing email)
- SMTP server: Address of the outgoing mail server, e.g. smtp.example.com
- SMTP port: Usually 587 (TLS)
- SMTP username and password: Credentials for sending email
After you save, Leadtime automatically checks whether the connection can be established successfully.
Once the account is active, it can be used for sending, receiving, or automated helpdesk email import.

After the account is connected successfully, it appears in the overview with the following information:
- Email address
- Display name
- Type (e.g. Microsoft 365, Google, IMAP)
- Status (active / inactive)
- Last updated
Test the connection
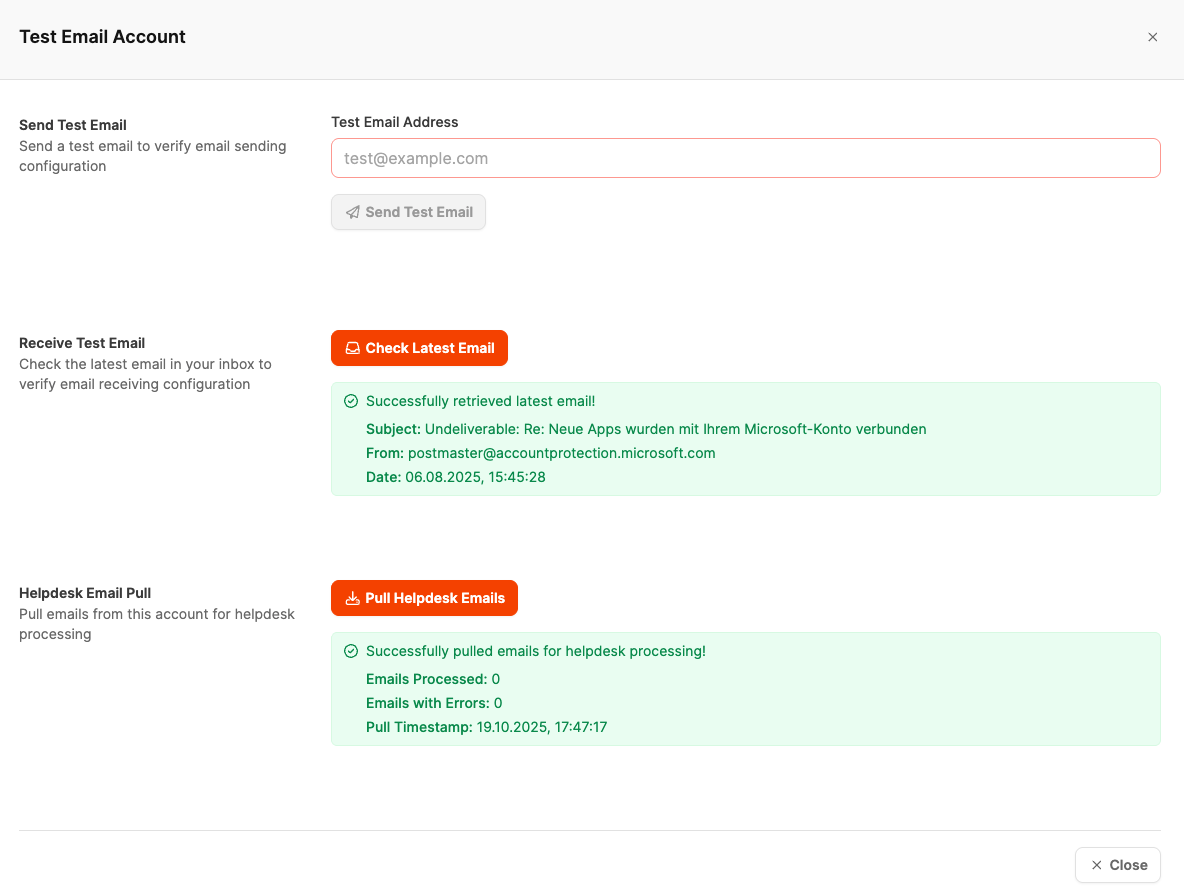
To ensure that the account is configured correctly, click the lab icon (Test) next to the email account.
The Test Email Account window then opens, where you can use the following functions:
-
Send Test Email
Sends a test message to check the sending configuration.
-
Receive Test Email
Retrieves the most recently received email to test the inbox.
-
Helpdesk Email Pull
Checks whether emails can be retrieved successfully for helpdesk import.
After a successful test, green confirmations appear with the latest retrieval details and status messages.
Email retrieval for the helpdesk
If you use Leadtime’s integrated helpdesk, emails can be retrieved automatically from connected mailboxes.
These messages are processed and converted into support tickets.
The test window shows how many emails were retrieved successfully or processed with errors, including the timestamp of the latest pull.
Go to the Helpdesk
Edit or delete an account
-
pencilEdit: Opens the account settings so that you can update the display name or connection, for example.
-
trashcanDelete: Removes the account completely from the workspace.
(This also affects helpdesk features that use this account.)