
Attendance Tracking (Clocking In and Out)
Recording and managing attendance times through manual or automatic clocking in and out, including team overview and daily statistics.
The daily check-in and check-out serves to record the actual attendance time of employees. Clocking in and out enables transparent and comprehensible documentation of daily working hours. This is particularly important for companies with flexible working hours or remote teams to accurately record attendance, booked time and billable hours.
How it works
Attendance tracking in Leadtime can be done in different ways - manually by clocking in and out or automatically using preset working times. The settings and appearances are managed in several areas of the application.
Basic settings
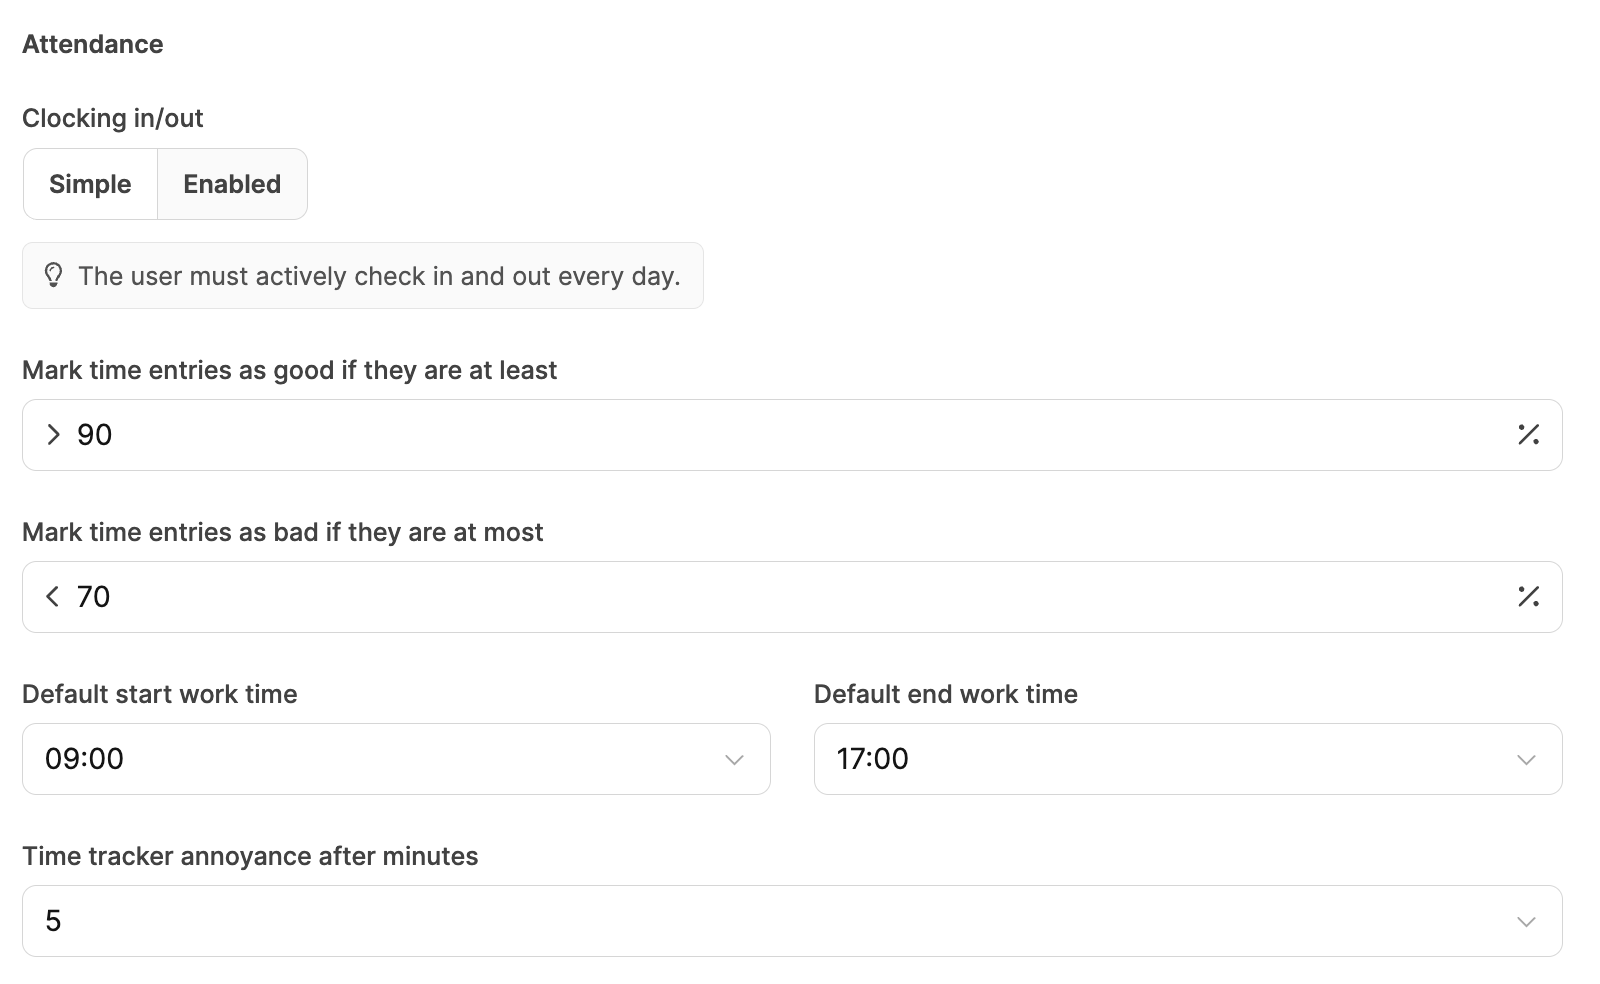
In Workspace Settings → General Settings, administrators can determine how attendance times are recorded in the company.
Two modes are available here:
- Simplified (Simple): The attendance time is automatically calculated based on the working hours defined in the contract.
- Complete (Enabled): Employees must actively clock in and out to document their attendance time.
In addition, threshold values can be defined there that determine the percentage from which recorded times are considered “good” or “bad”.
Example:
- Times over 90% of the target time are marked green (good).
- Times below 70% of the target time are marked red (incomplete).
Administrators can also configure default working hours (e.g. 9 a.m. - 5 p.m.) and reminder intervals for the Time Tracker.
About the workspace settings: General settings
Time statistics
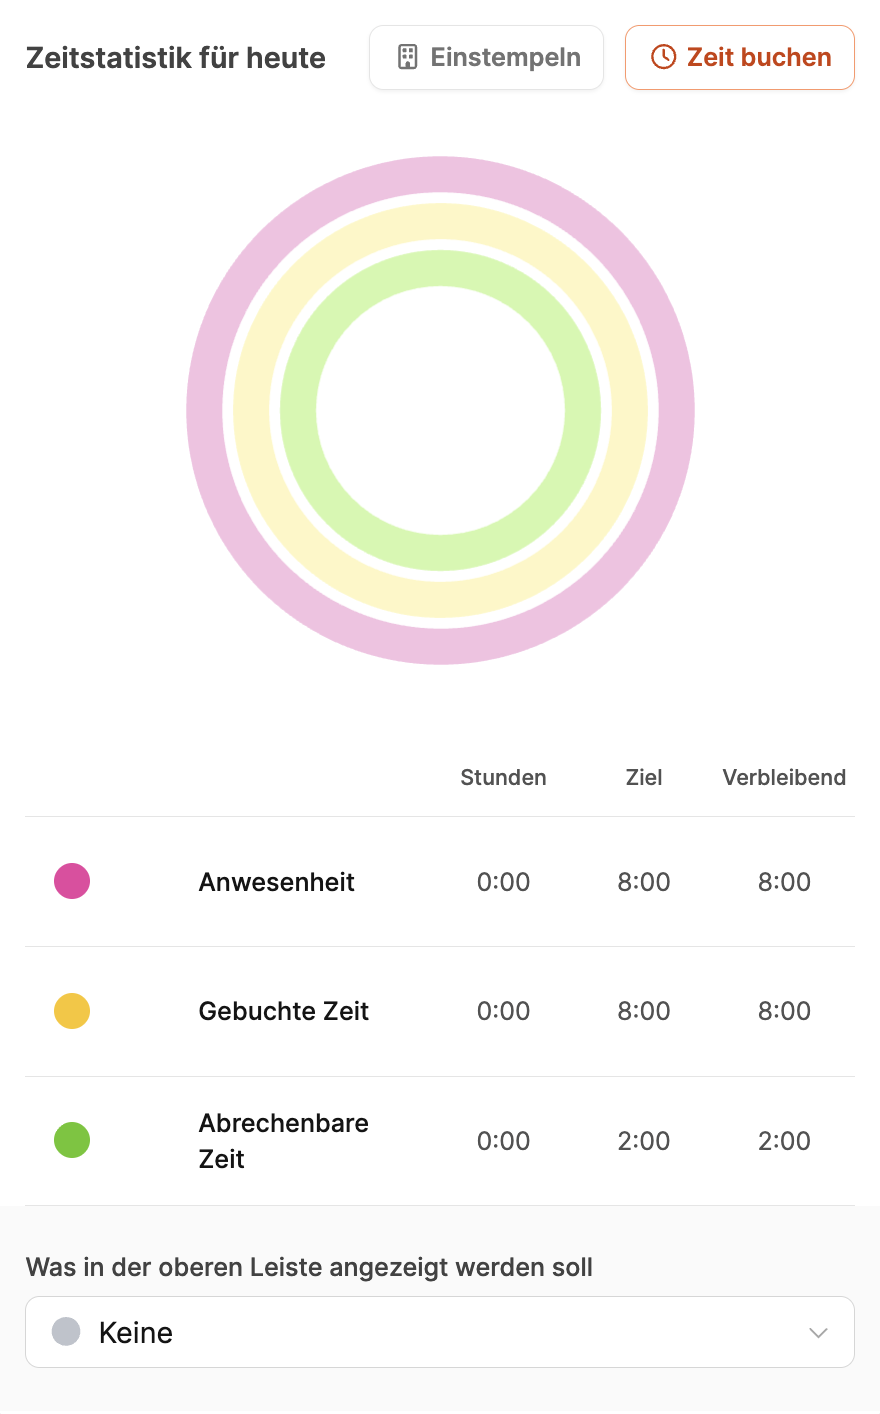
Using the “Time statistics for today” button in the header bar, employees can view their current daily statistics.
This overview shows three central types of time in the form of colored rings:
- Presence (pink) – The total time between clocking in and clocking out.
- Booked time (yellow) – The working times booked for tasks or projects.
- Billable time (green) – Time that is directly assigned to a customer project – and is therefore billable.
Hours, target values and remaining times are displayed below.
Employees can use a drop-down menu to select which of these categories should be displayed in the top bar as a progress indicator.
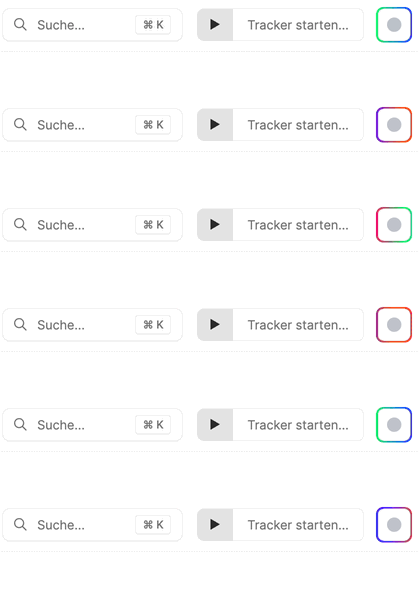
When active clock-in is required, the “Clock in” button starts to flash to remind the user to start time tracking.
Clock in and book time
Clocking in can be done in two ways:
1. Quickly clock in via the profile menu
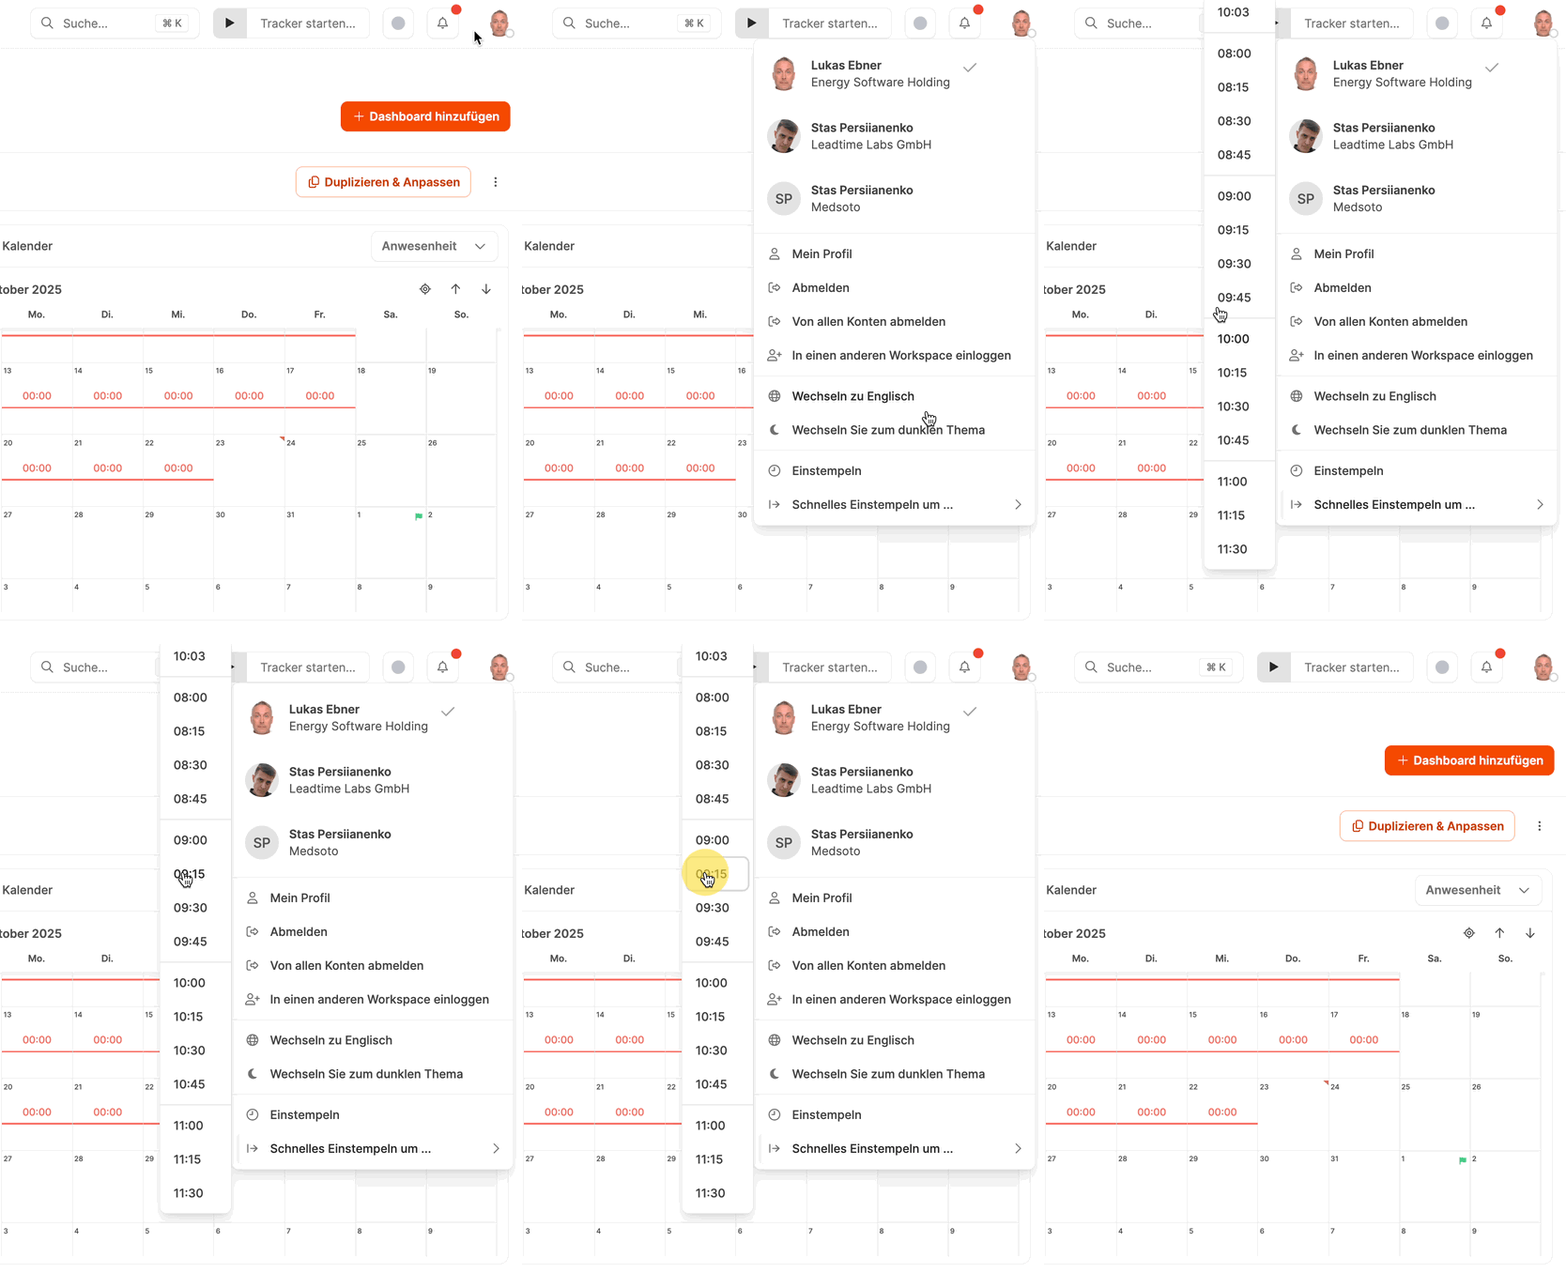
The profile icon in the header opens a menu in which users can directly select a predefined start time (e.g. 09).
The clock-in process will be completed immediately.
2. Clock in via dialogue
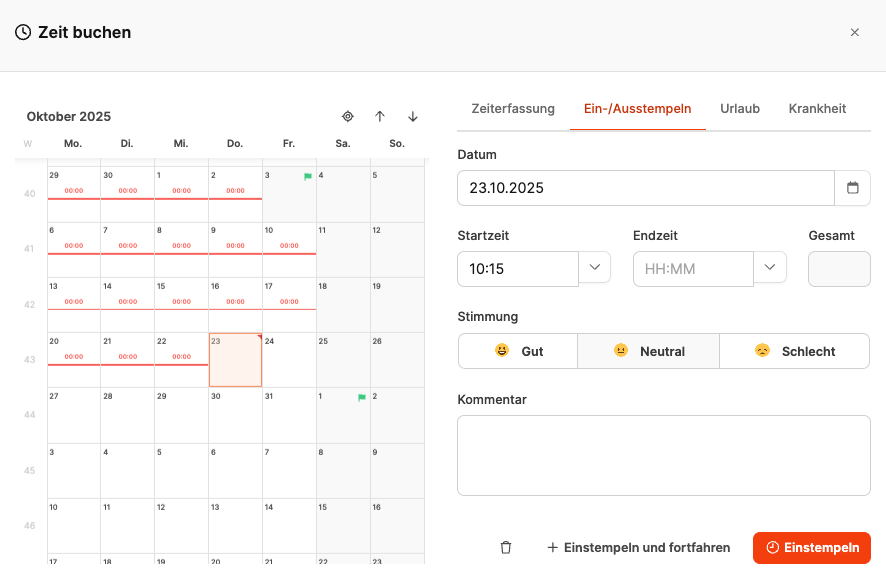
When the user selects the “Book time” item in the menu, the full time-entry dialog opens.
The following information can be provided here:
- Date
- Start and end time
- Mood (optional)
- Comment
The process is completed by clicking “Clock in” or “Clock in and continue”.
Via the time statistics dialog
The “Clock in” button is also located within the daily statistics, and it opens the same booking dialog.
This means that the attendance time can be added directly from the overview.
Team calendar
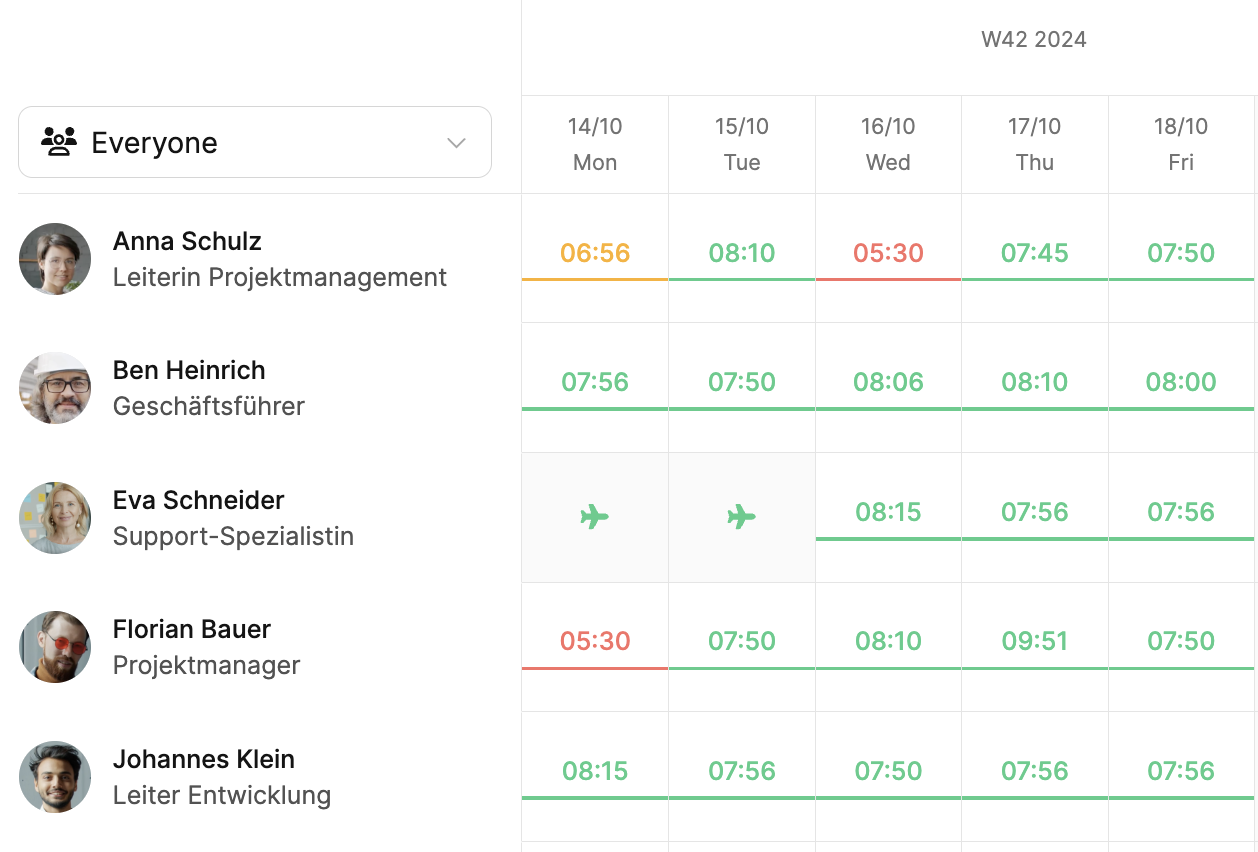
In the Team calendar, all recorded attendance times and absences are displayed in a weekly view.
Each row represents an employee and each column represents a day of the week.
Colored markings show the capture status:
- Green: complete or above average time recording
- Yellow: minor deviations
- Red: incomplete or missing time recording
- Symbol airplane_departure**:** Absence (e.g. vacation)
This view makes it easier for managers to keep an overview of attendance and absences as well as the level of time recording in the team.
You can see at a glance who is meeting their goals and where follow-up bookings are necessary.