
Conditions in Work Packages
Conditions control which elements of a project component are visible or active. They link questions, to-dos, or test cases to enable dynamic, context-dependent project structures.
Conditions control the visibility and activity of individual elements in Leadtime project components.
They ensure that work packages, checklists, acceptance tests, or questions are displayed only when they are actually relevant to the current project scenario. This keeps the project structure clear and flexible.
How it works
Conditions link one element (such as a work package) to another element that acts as the trigger.
The dependent element becomes visible only when the defined condition is met—for example, when a specific answer has been provided or a to-do has been completed.
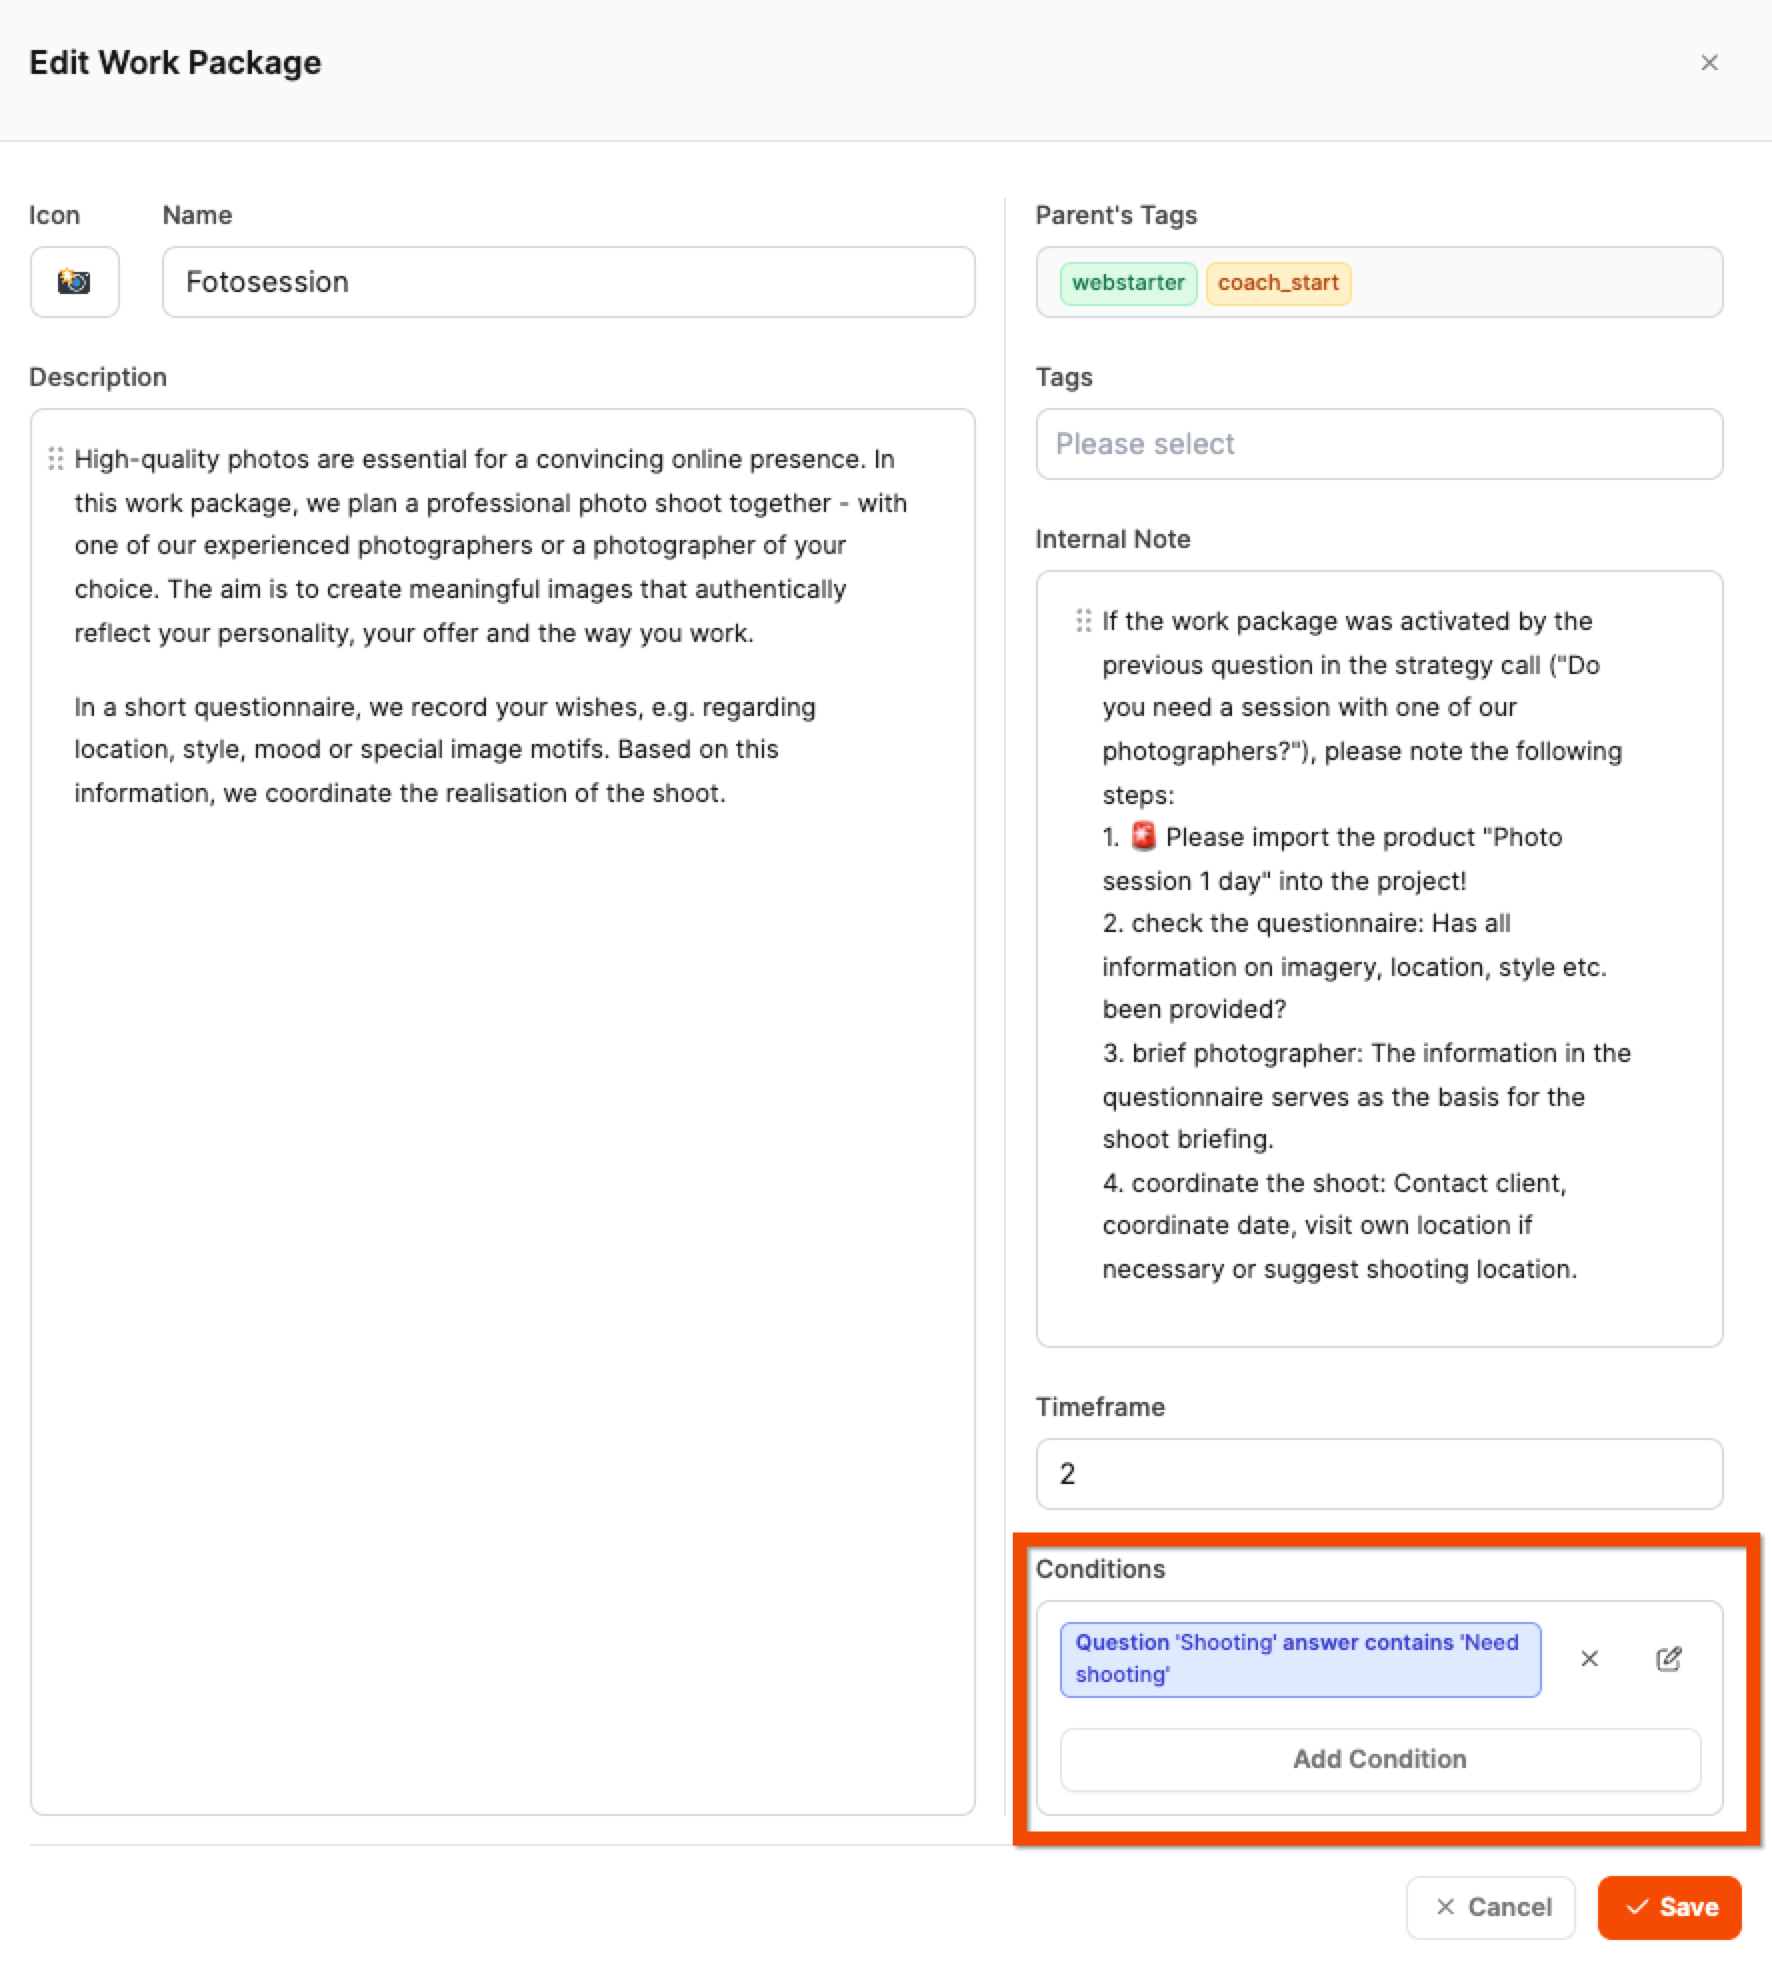
Example:
A company creates websites with optional additional services.
If the project indicates that the customer does not have their own photos, the additional “Photo session” work package—a photo shoot with a photographer—appears automatically.
How to create a conditional work package
The building blocks of project components
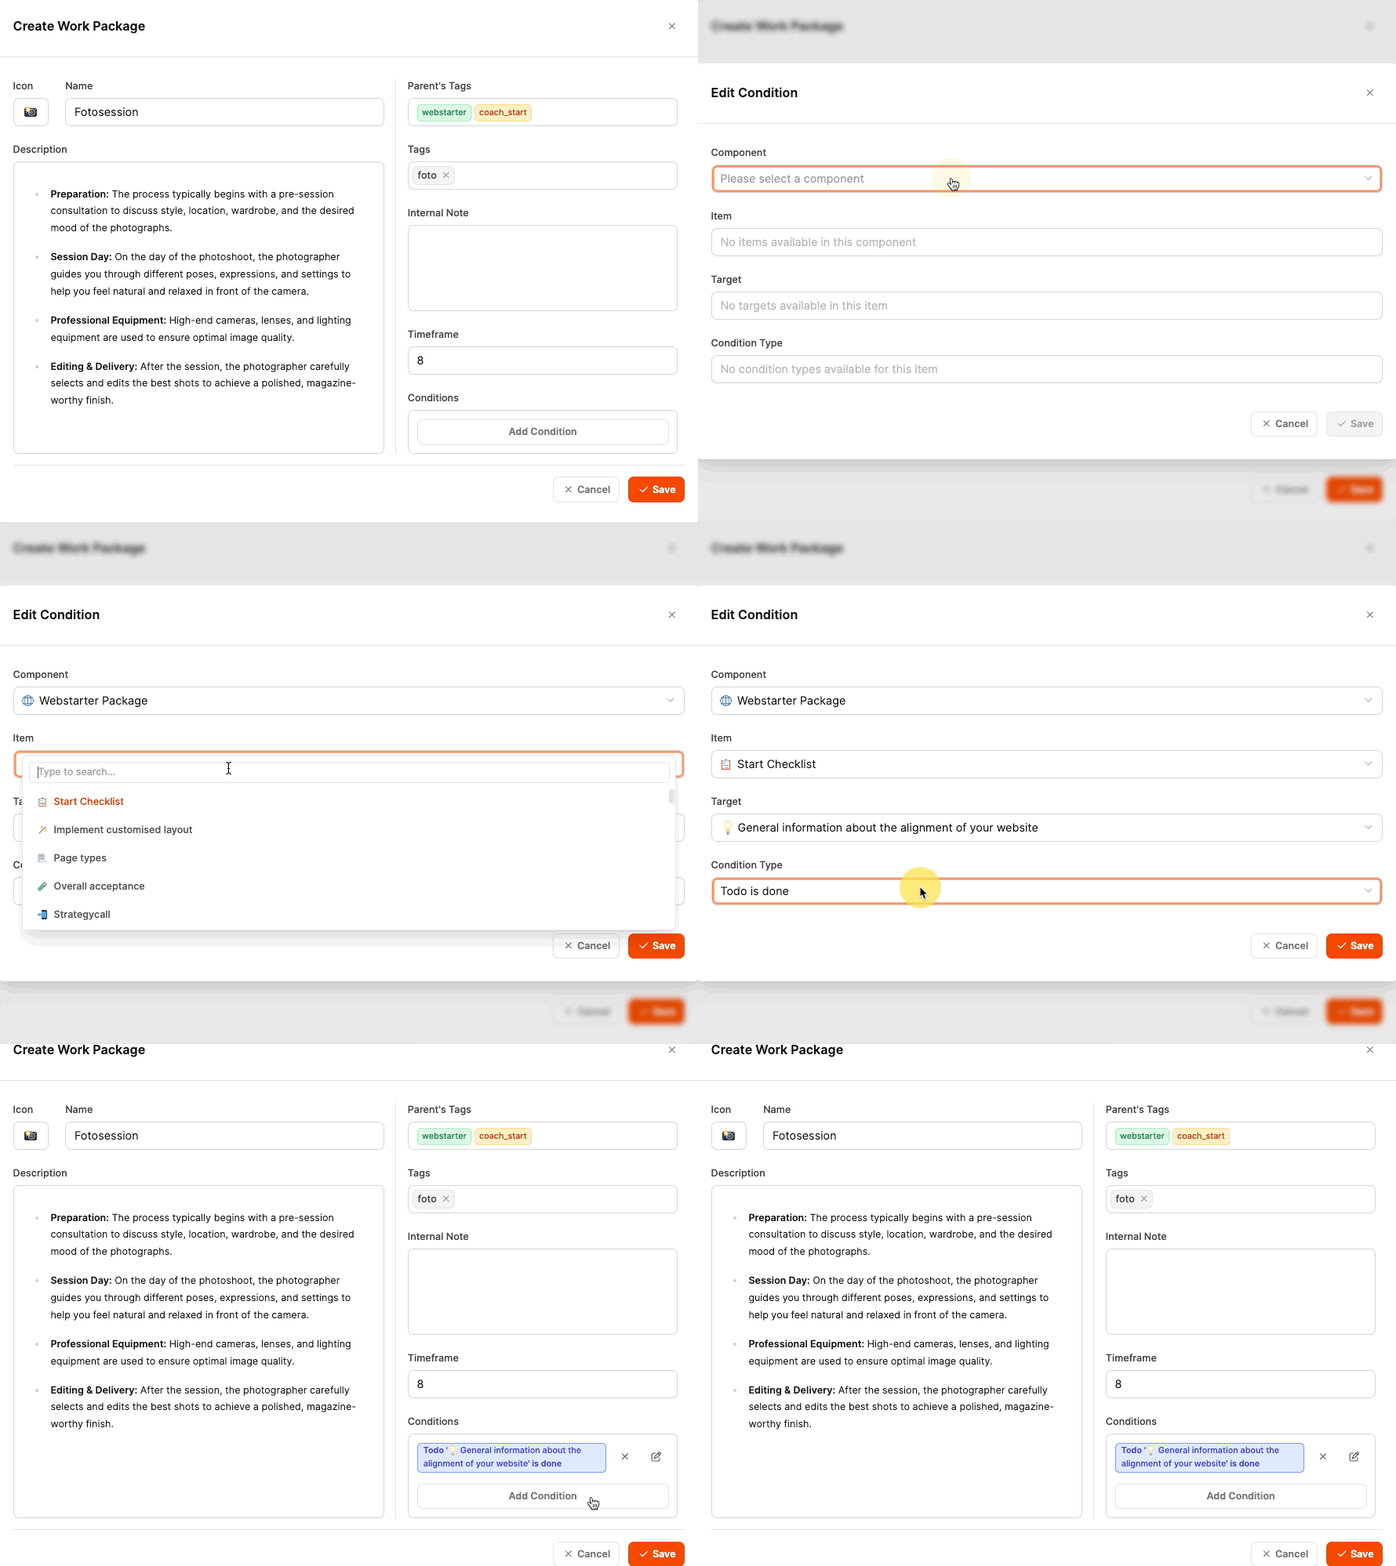
1. Create the element
First, create the element that should depend on a condition—for example, a work package, checklist, or acceptance test.
2. Add a condition
In the element’s edit form, find the “Conditions” section.
Click “Add Condition” to create a new condition.
3. Define the target element
Select the element that controls the condition.
This can be:
- A question in a work package
- A to-do in a checklist
- A test case in an acceptance test
[!INFO] Conditions can also work across components—a work package in component B can therefore depend on an answer in component A.
Example:
- Component A (Website): Question “Is there an existing design template?”
- Component B (Blog): The “Design blog” work package is displayed only when the answer is “No.”
4. Select the condition type
Different condition types are available depending on the element type:
| Condition | For checklist | For acceptance test | For work package | Description |
|---|---|---|---|---|
| Todo is done | check_mark_button | cross_mark | cross_mark | The element appears when a task has been checked off |
| Todo is not done | check_mark_button | cross_mark | cross_mark | The element appears while a task is still open |
| Test case passed | cross_mark | check_mark_button | cross_mark | The element appears when a test case has passed |
| Test case failed | cross_mark | check_mark_button | cross_mark | The element appears when a test case has not passed |
| Question is answered | cross_mark | cross_mark | check_mark_button | The element appears when the related question has been answered |
| Question is not answered | cross_mark | cross_mark | check_mark_button | The element appears while the question is unanswered |
| Answer contains | cross_mark | cross_mark | check_mark_button | Checks whether checkbox answers contain specified values |
| Answer does not contain | cross_mark | cross_mark | check_mark_button | Checks whether specified checkbox values were not selected |
| Answer equals | cross_mark | cross_mark | check_mark_button | Checks whether a radio button answer matches exactly |
| Answer does not equal | cross_mark | cross_mark | check_mark_button | Checks whether a radio button answer differs |
5. Combine multiple conditions
You can also add multiple conditions that must all be met before an element becomes visible.
This allows you to model complex dependencies, such as scenarios in which several questions must meet their conditions at the same time.
Conditional questions
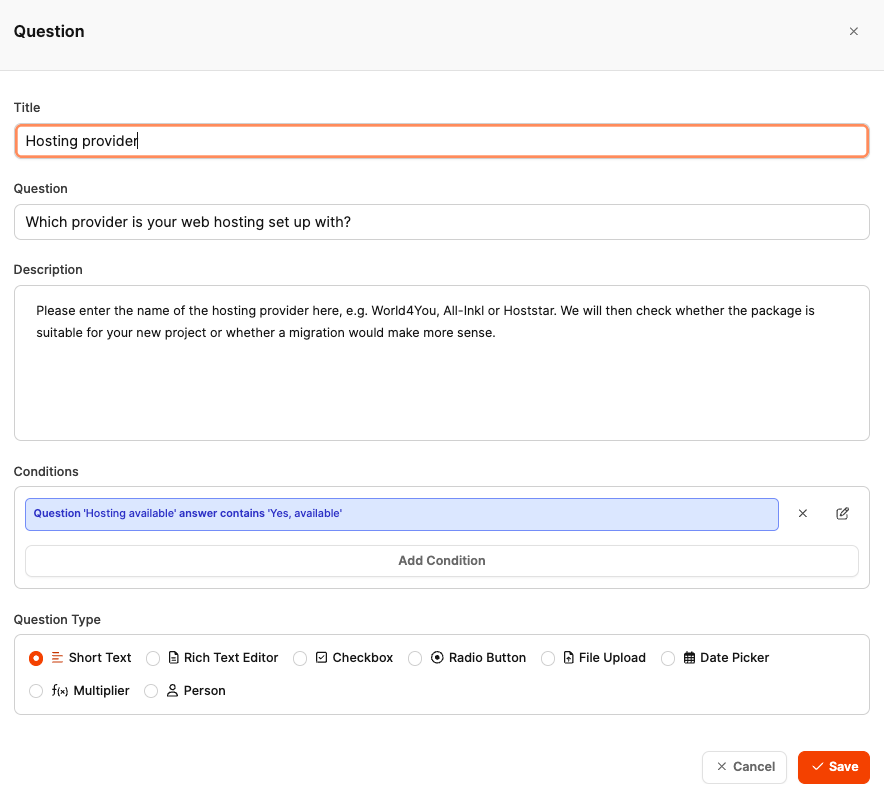
Conditional questions make it possible for specific questions within a work package to appear only after a defined condition has been met.
What does this mean in practice?
Not every question is relevant to every project. Some information is needed only when a particular scenario applies. Conditional questions prevent users from seeing unnecessary questions that do not apply to them.
When should you use them?
Use conditional questions when a question is relevant only if a preceding question was answered in a particular way.
Example:
- Question 1: “Have you already hired a hosting provider?” (Yes/No)
- Question 2: “Please enter your hosting provider” is displayed only if the answer to question 1 is “Yes.”
As a result, users see only the questions relevant to them, keeping forms concise and easy to understand.
Inactive elements
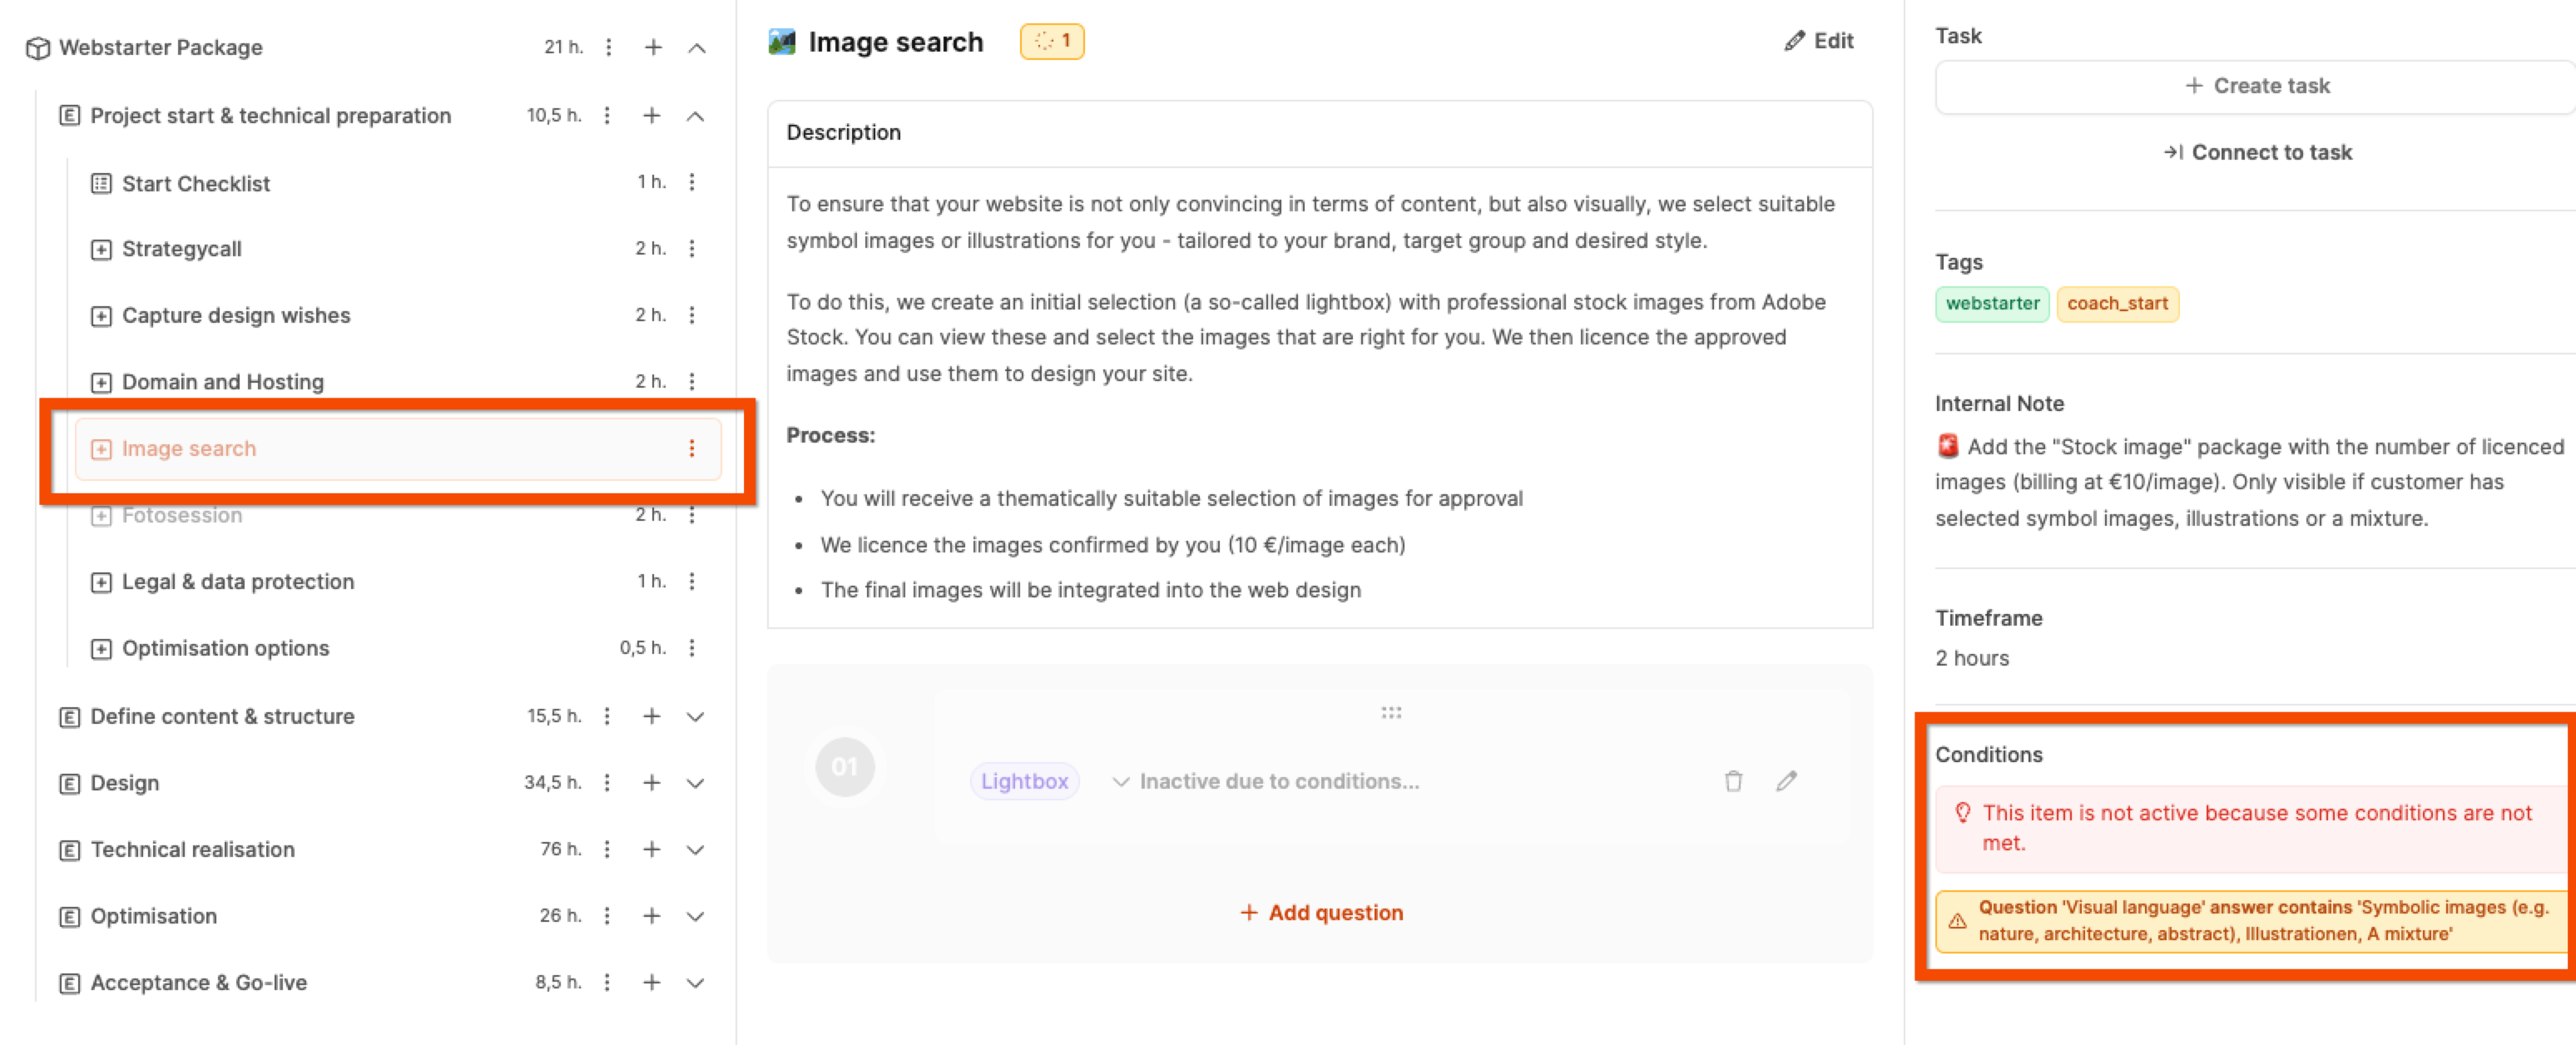
When conditions are not met, the related elements are shown semi-transparent in the project tree.
These inactive elements are not included in the project’s effort estimate.
Clicking an inactive element displays an explanation in the right-hand column of why it is disabled.
If you know that an element is not required, you can remove it from the project manually—it remains available in the Component Library.