
Invoicing Tickets
Closed tickets are checked, adjusted and finally invoiced via invoice verification.
You’ll find this area under Billing → Invoice verification. Completed tickets are collected here, checked and turned into an invoice for the customer. You can adjust times, correct titles and decide whether individual tasks should be billed. Once approved, the invoice is moved to the Receivables section.
About the ticket system: Projects – Tasks tab (ticket system)
Various products and services can be invoiced in Leadtime. The most common approach in the service sector is billing for working hours. In Leadtime, this is done on the basis of tickets.
The basic principle is as follows: A company has customers and runs projects for them. Each project consists of many smaller matters that the company resolves for the respective customer. A ticket is created for each matter; the employees complete the task and book their working time on the ticket. The total working hours on a ticket are ultimately multiplied by an hourly rate and invoiced to the customer.
Using a concrete example, this text describes the entire process in detail – from processing and closing a ticket through to the final invoice.
About the ticket system: Projects – Tasks tab (ticket system)
The billing process
Leadtime organizes projects and tasks in a clearly defined data structure. The billing system uses this structure to bill services automatically and precisely.
Data structure
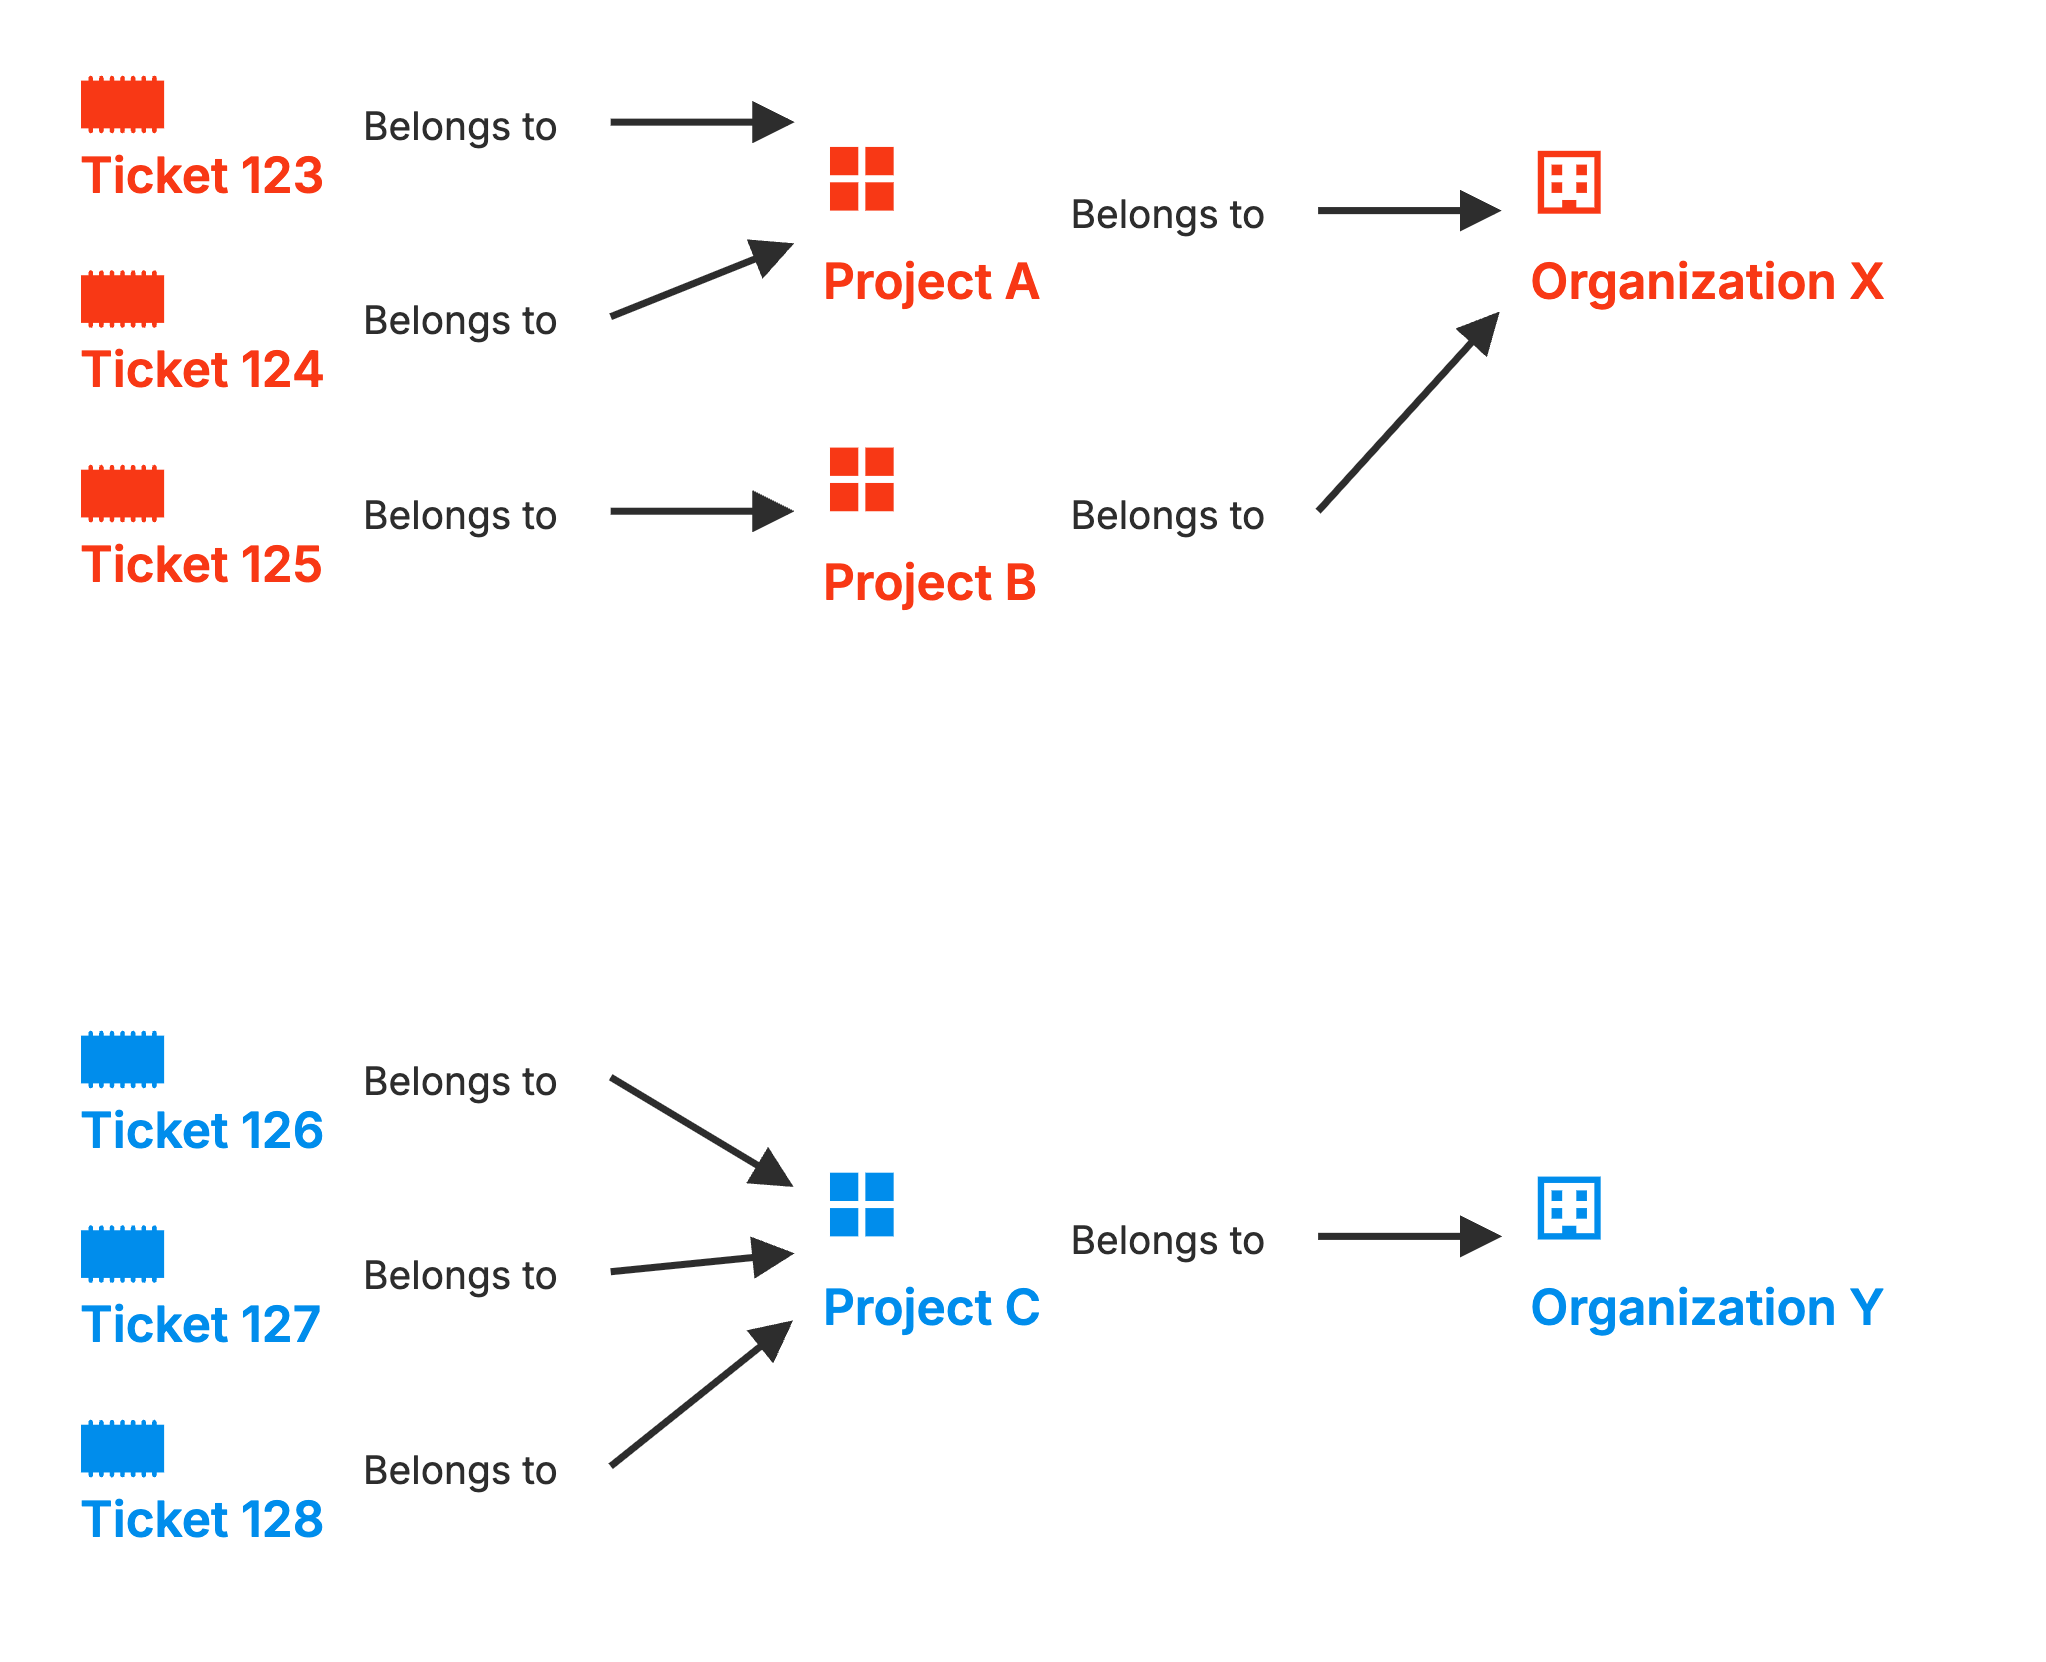
Every organization in Leadtime can contain multiple projects. These are either:
- Ongoing – For recurring customer requests such as support or maintenance.
- One-time – For extensive projects that need to be specified, planned and quoted in detail.
In this text we look at ongoing projects, i.e. projects in which the customer repeatedly submits requests that we have to resolve and ultimately invoice.
Creating a ticket
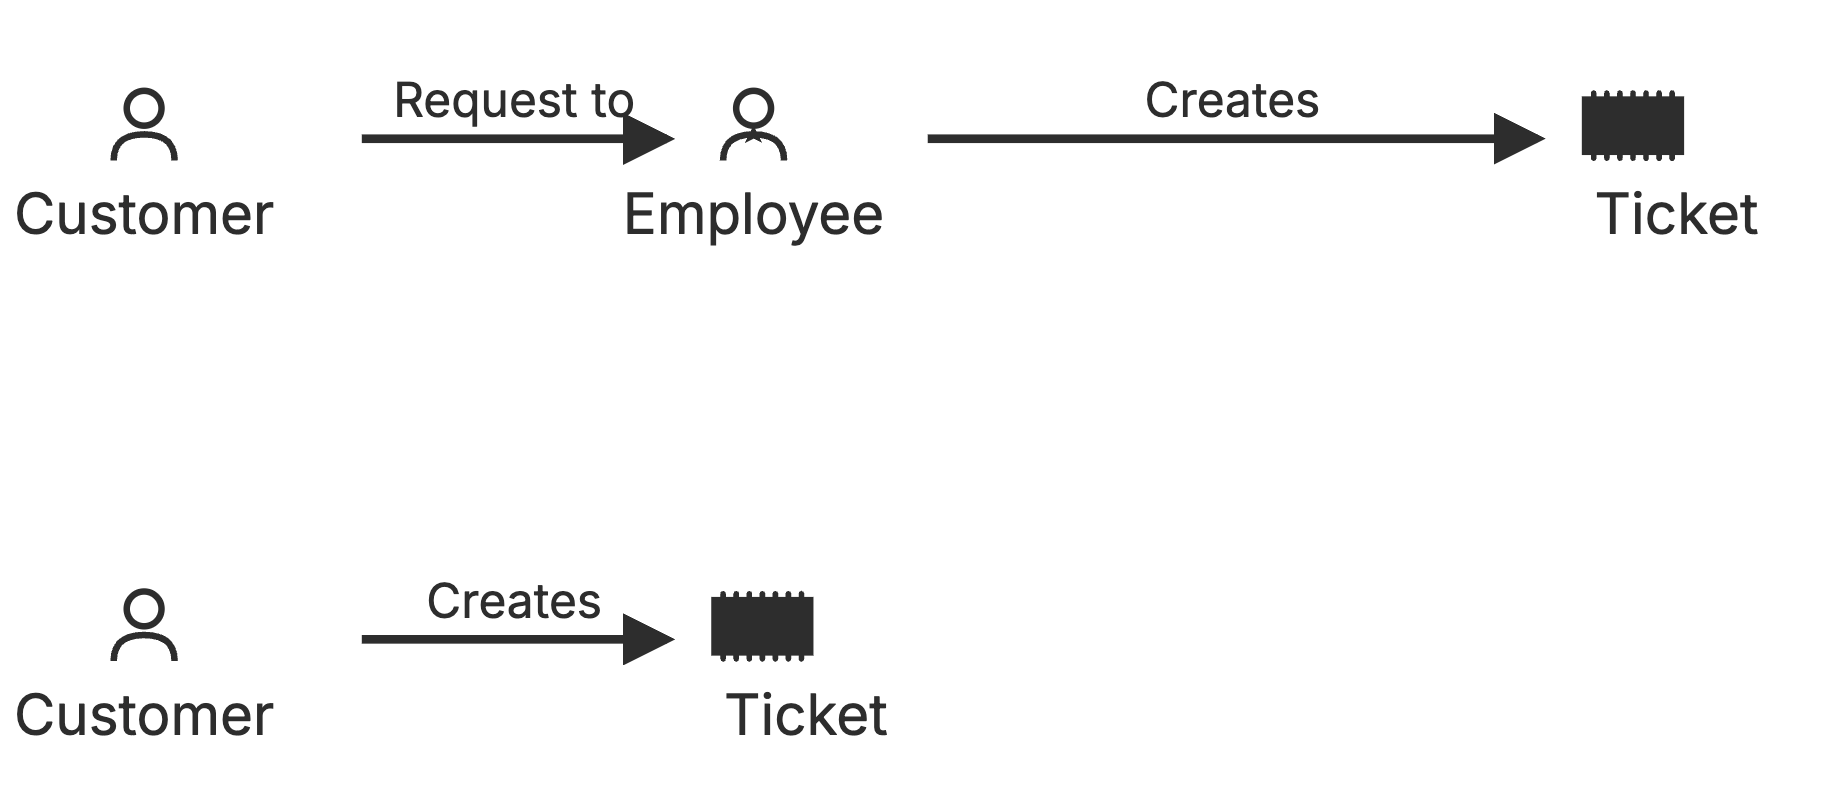
Projects contain tickets. A ticket is created for each customer request. Customers can do this themselves if they have access to the Leadtime platform; it can also be done by an employee – for example if the customer contacted you by phone or email.
In the customer project, the “Tasks” tab shows all tickets that are currently being processed. However, they only become billable once they have reached the “Closed” status.
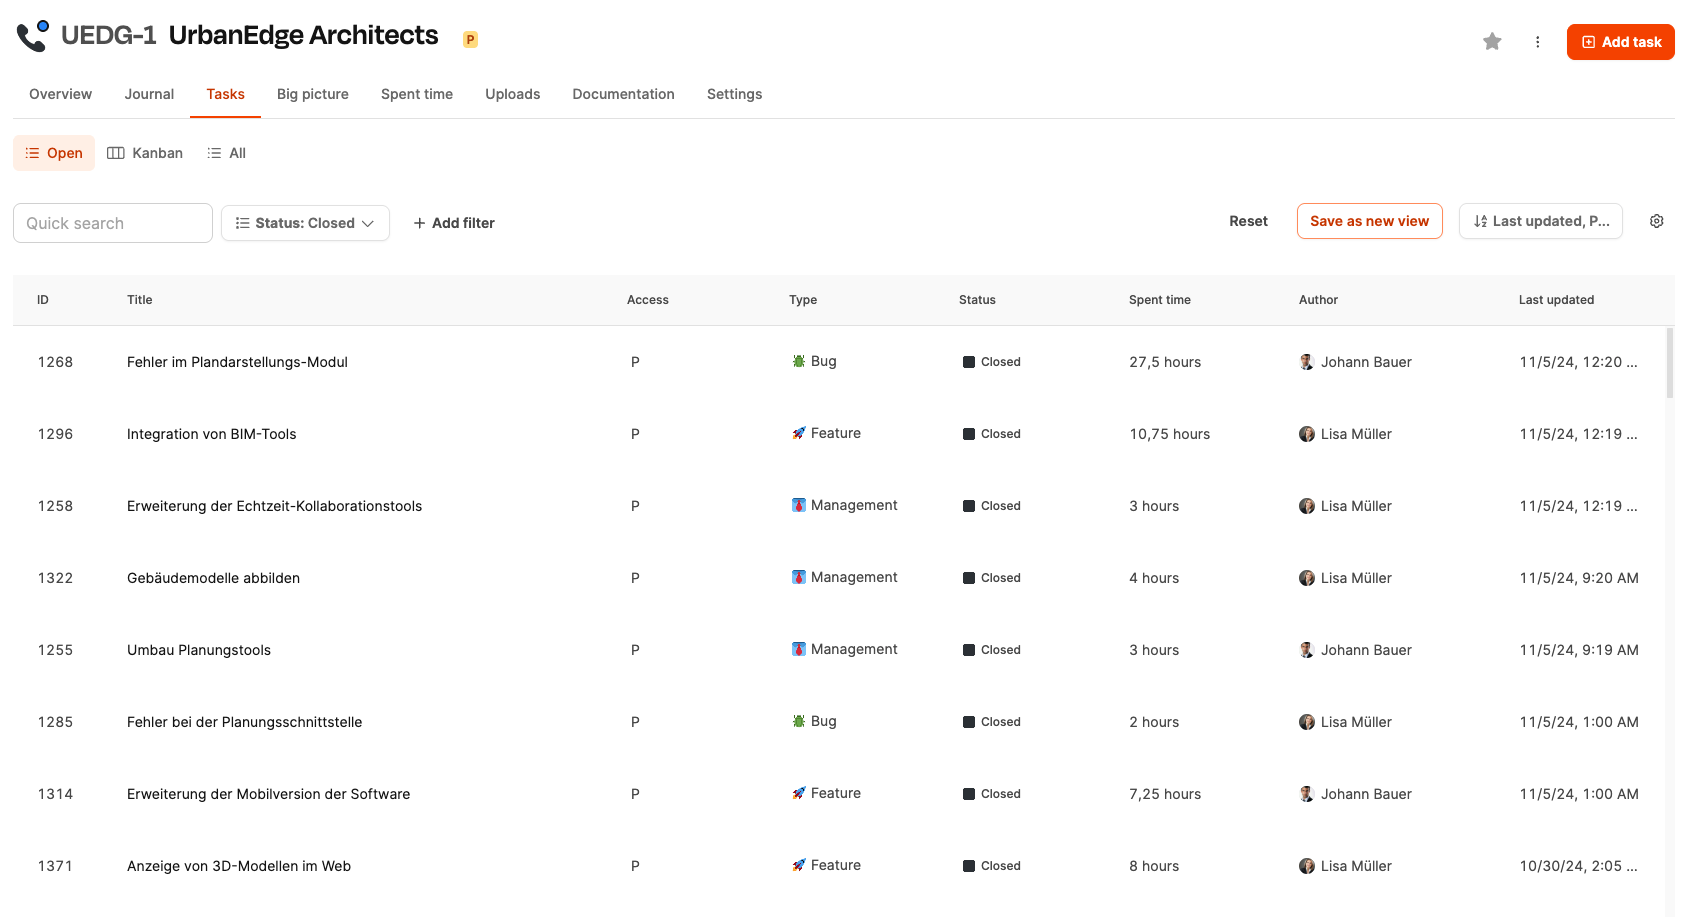
- Status: Tickets go through various statuses such as New, In progress, Done and Closed.
- Time bookings: Employees book their working time directly on the tickets.
- Collaboration: Several employees can work together on a ticket and book their working time on it. The hours worked by everyone involved are added up.
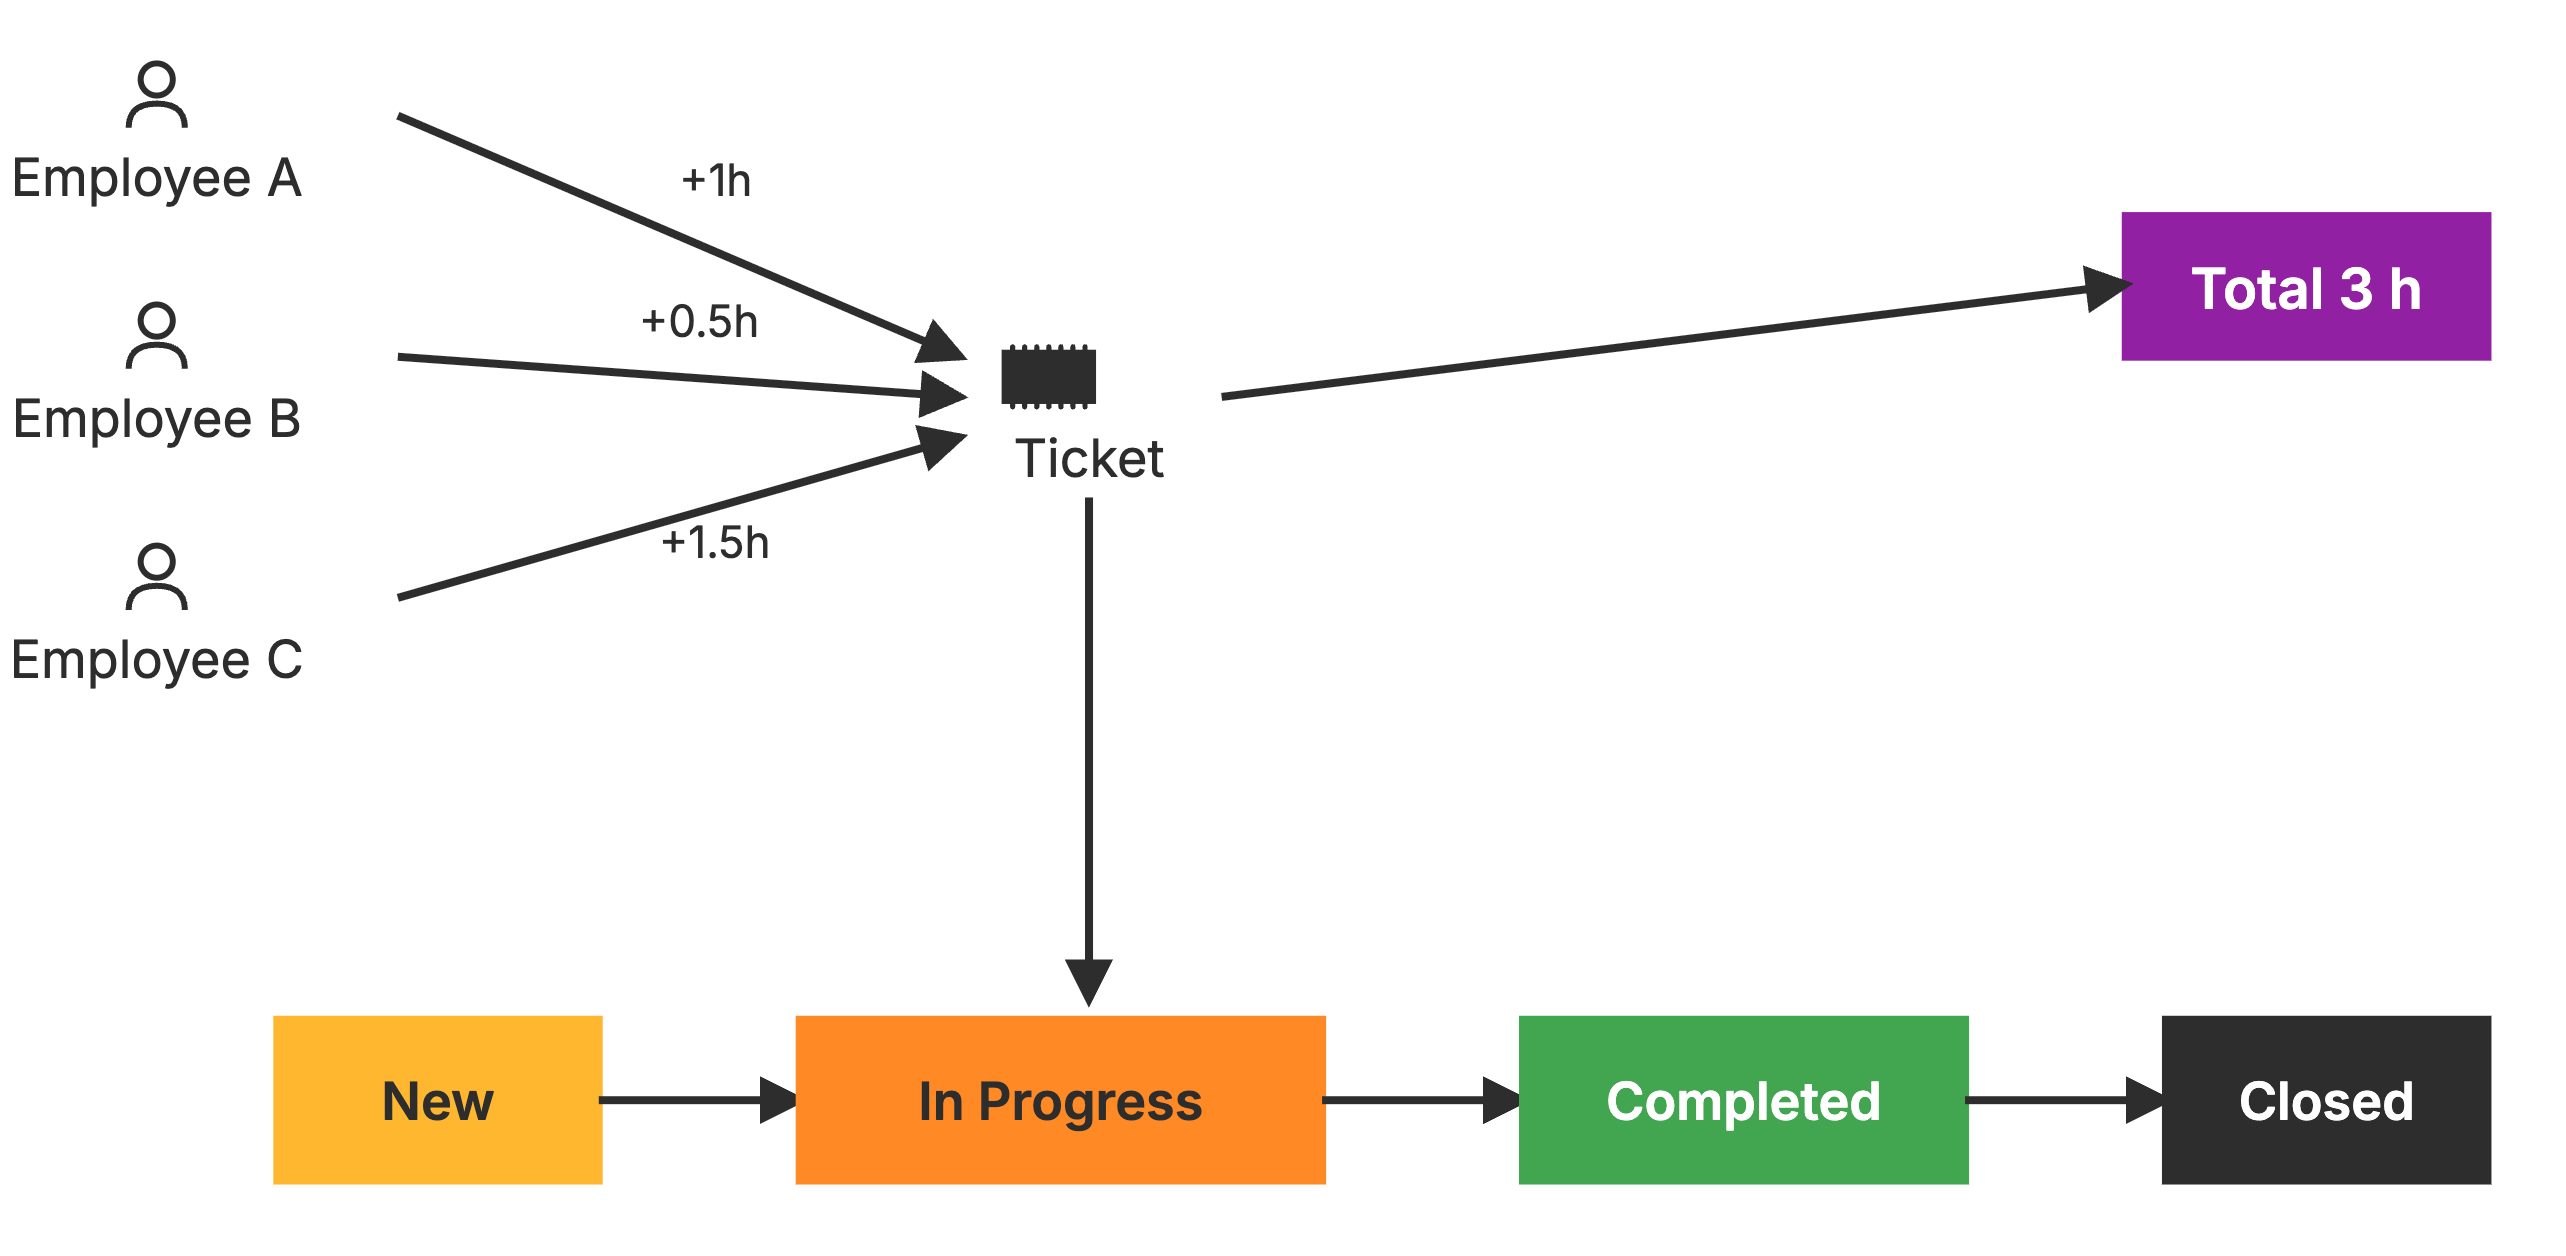
Task statuses are managed here: Individual task statuses
A ticket ready for billing
In this example, the ticket with ID 1296 was finally closed after intensive processing. As soon as the ticket’s status is changed to Closed, it becomes relevant for billing.
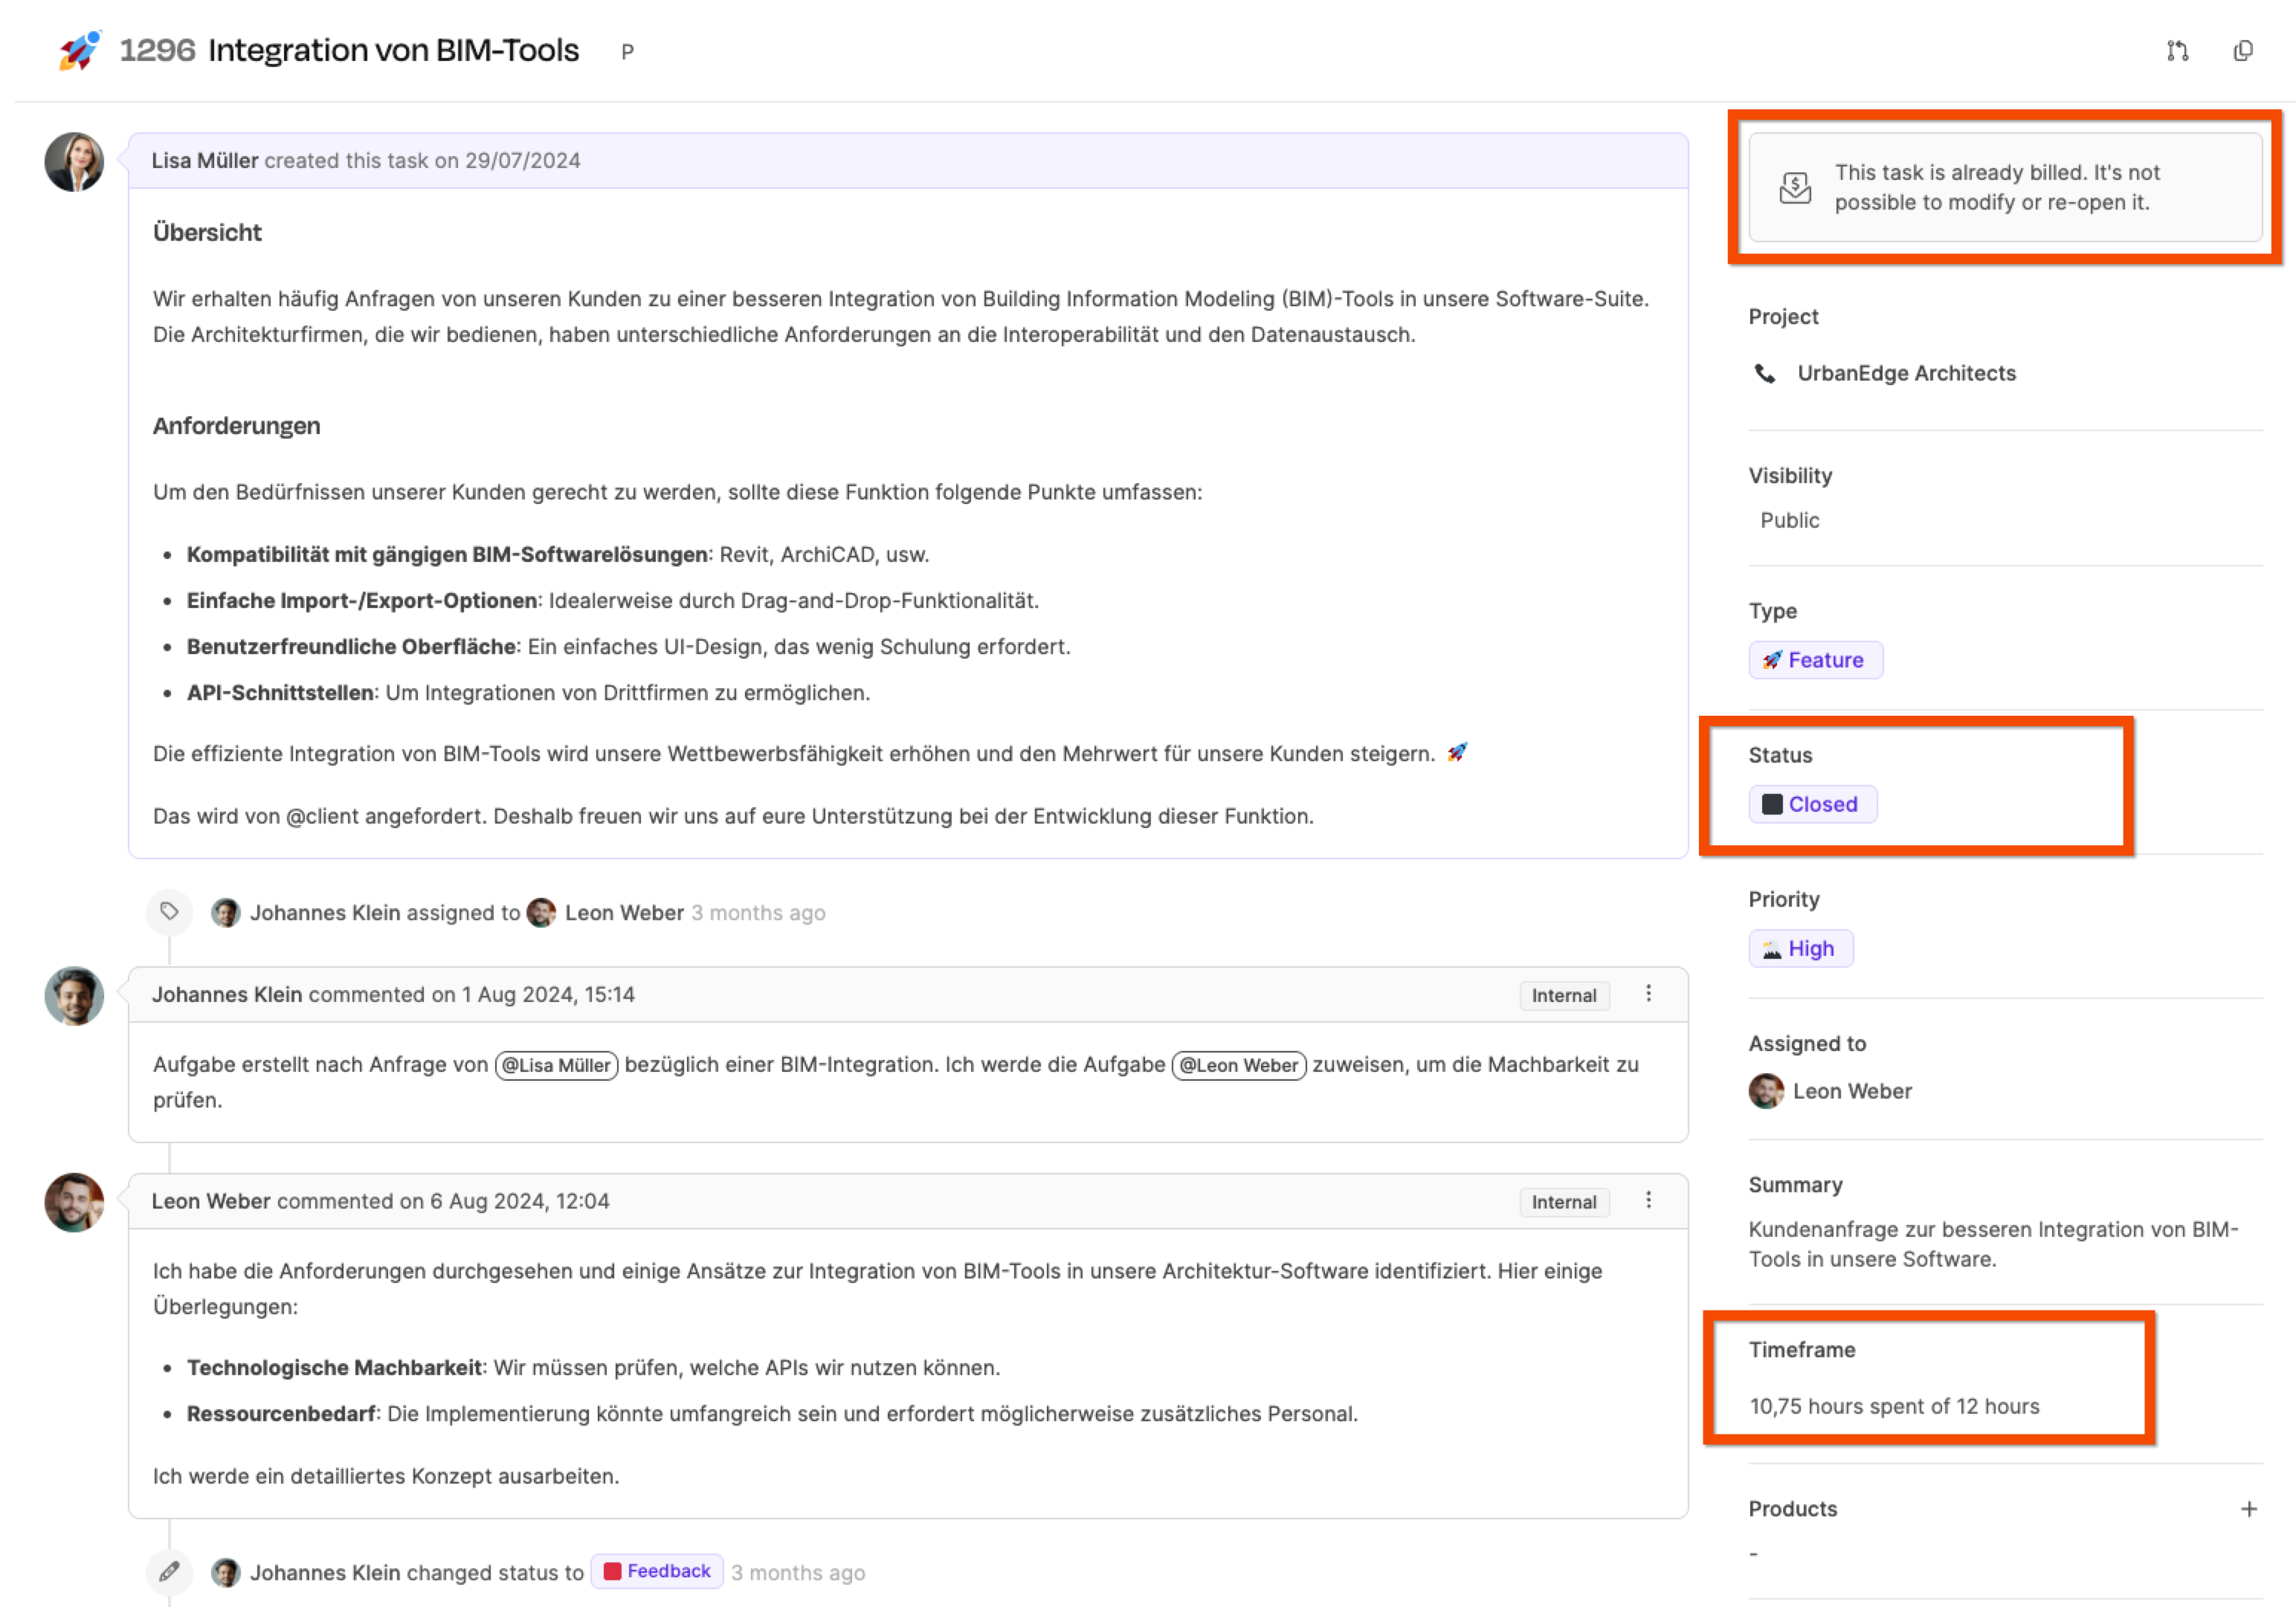
In the right column under “Time frame”, the working time spent on the ticket is displayed. Here we can see that 10.75 hours were booked on the ticket, even though the original estimate was 12 hours.
Detailed view of the ticket’s time bookings
Check the time tracked on a ticket
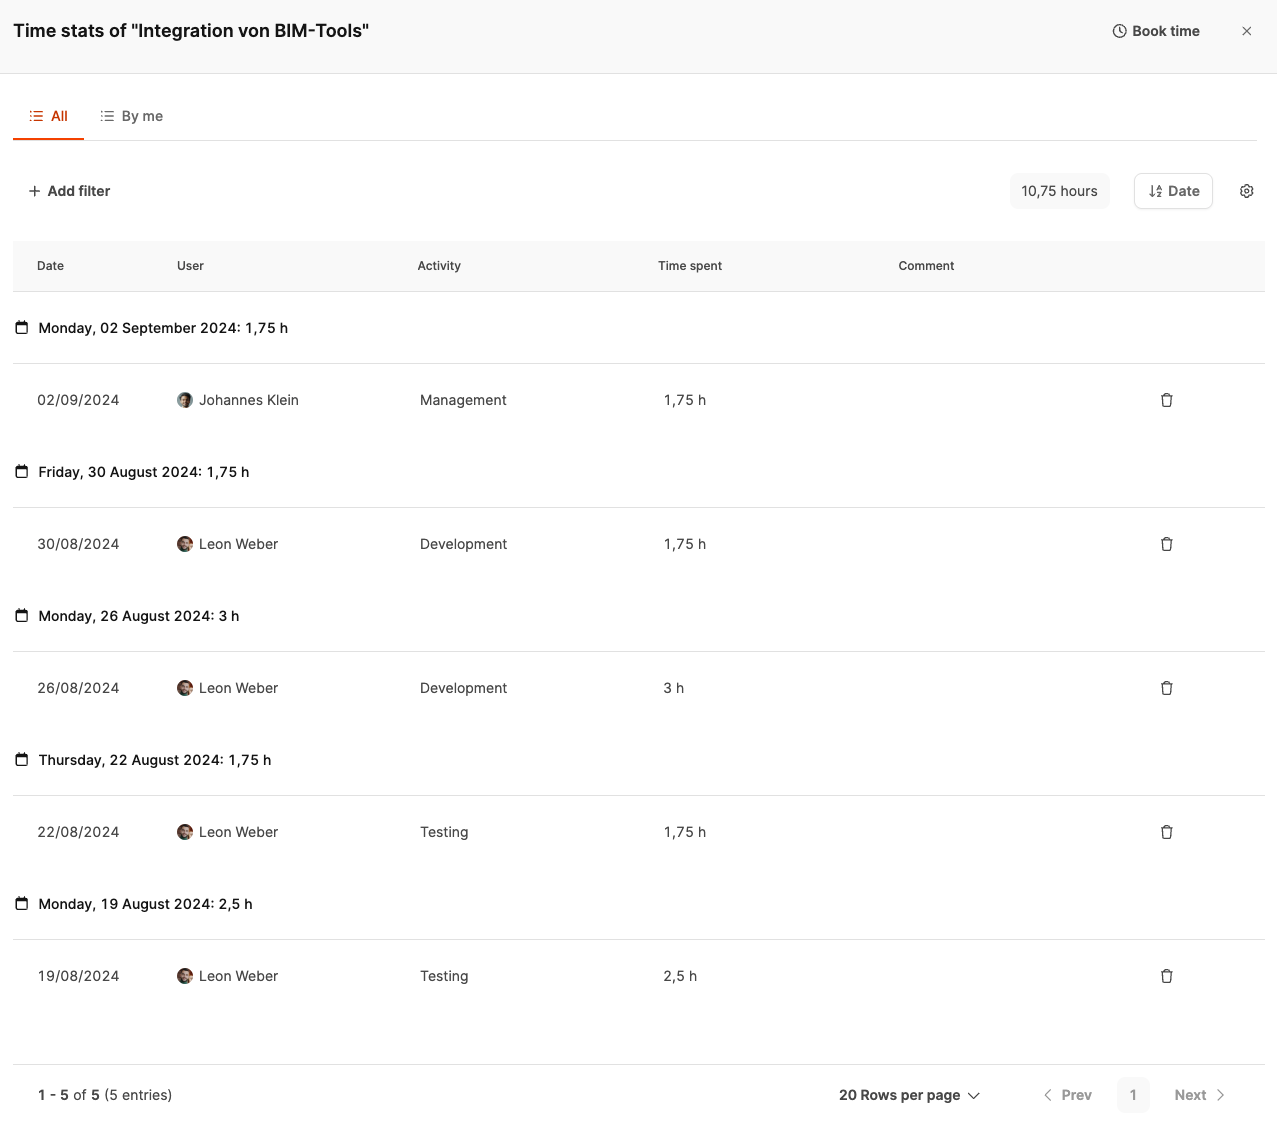
To get more information about the ticket, we open the detailed view by clicking on the line with the time estimate and the booked time.
Clicking on the time frame opens the time tracking statistics, which break down all time bookings in detail:
- Date: Each booking is listed by day.
- Employees: The people involved and their activities.
- Activity: Clearly defined activities such as management, testing or development.
We can now see how the 10.75 hours of total time are made up. Various employees booked time on the following activities:
- Management: 1.75 hours
- Testing: 4.15 hours
- Development: 4.45 hours
With its 10.75 hours, the ticket is ready for billing.
Carrying out the invoice verification
Navigate to the Billing → Invoice verification area.
Draft invoice
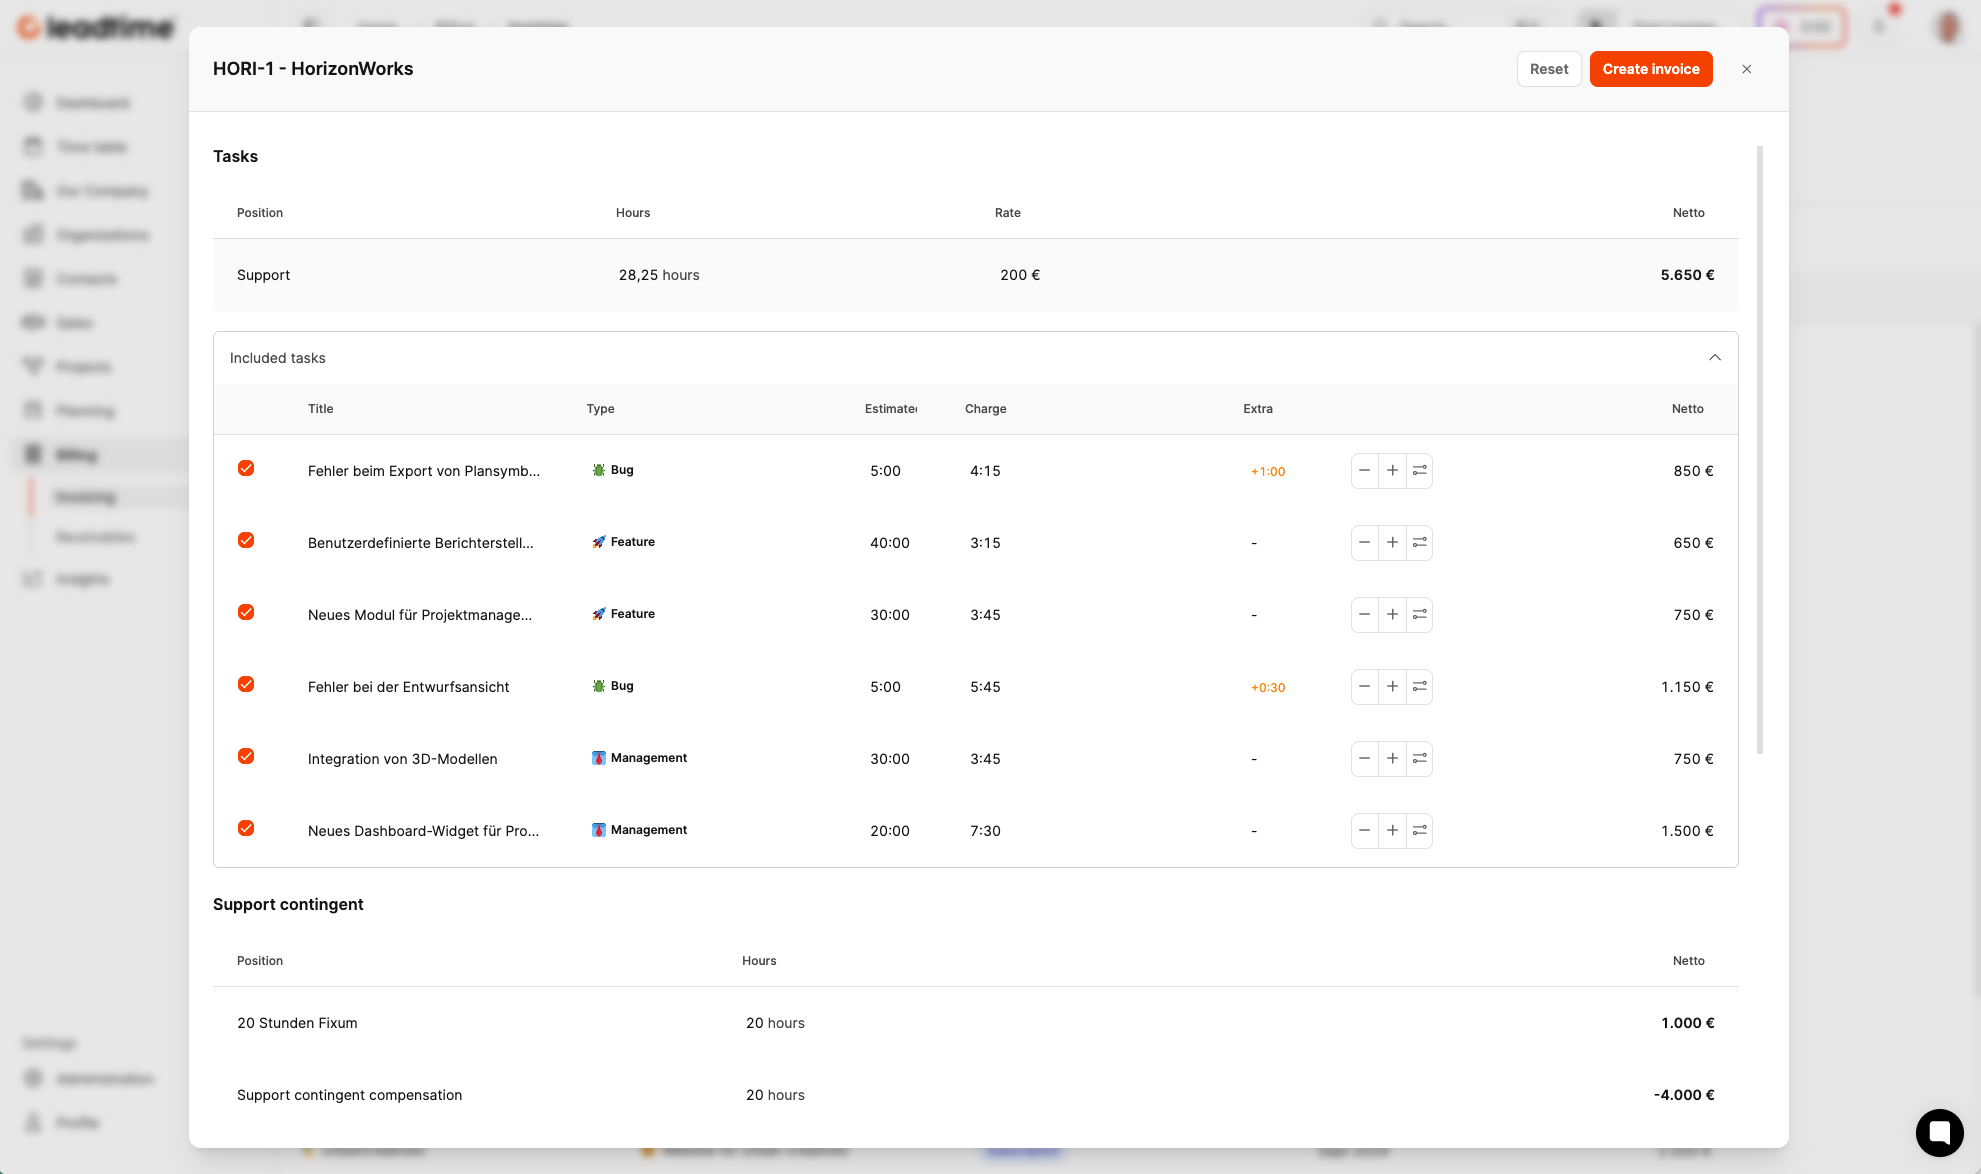
After the ticket is closed, a new draft invoice automatically appears in the Invoice verification area. Until this draft invoice is billed, any additional tickets closed in this project are also added to this pending draft invoice. In this example, all the tasks included result in a total of 80 hours.
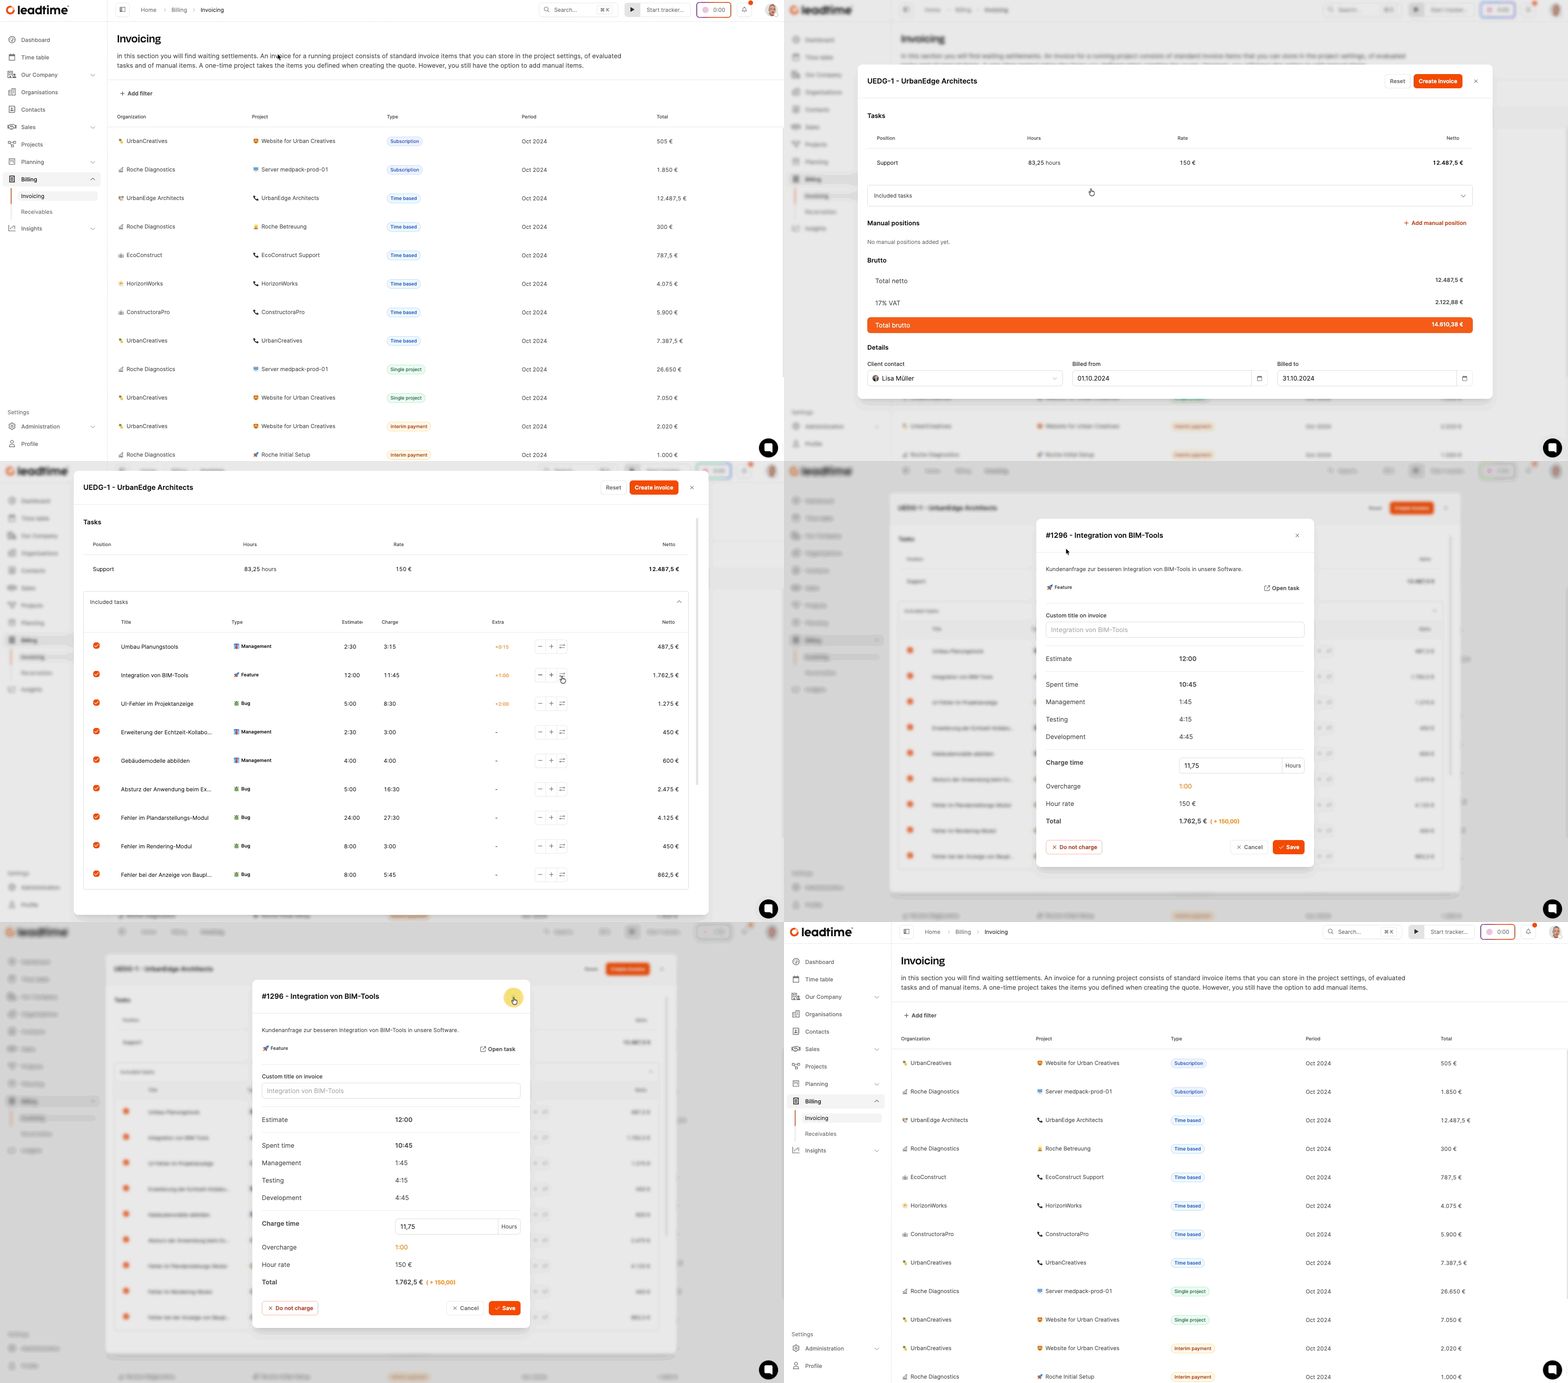
Adjusting individual tickets
By clicking on “Tasks included”, you can view the list of all tickets contained in this draft.
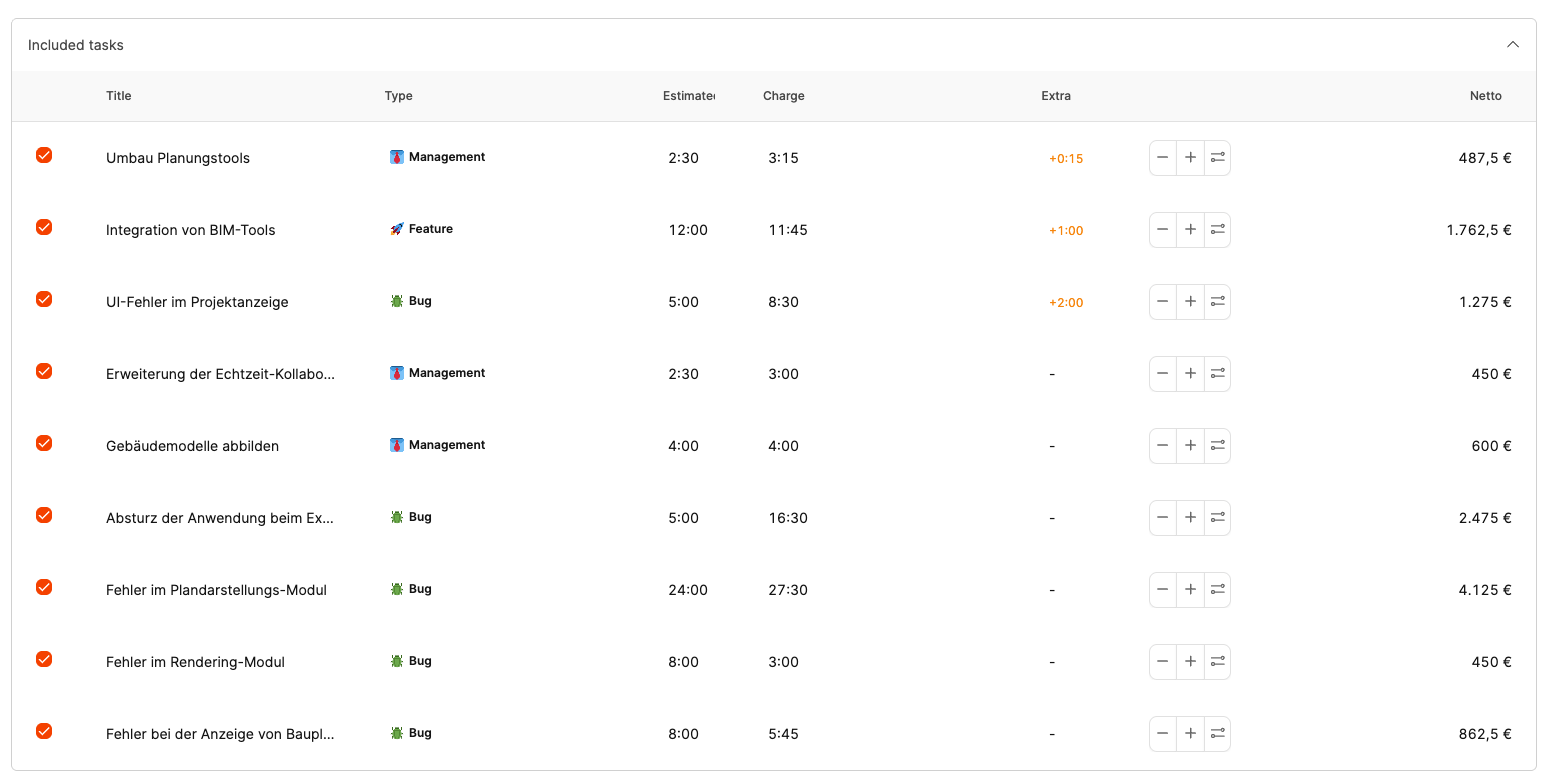
Before the invoice is released, the individual tickets can be checked and adjusted one by one. To do this, click the right button in the small button bar next to the individual task.
Adjusting the title

In the detailed view, a ticket’s title can be changed to make it more understandable for the customer. For example, the title Integration of BIM tools can be supplemented with additional details that allow the customer to identify it clearly.
Time correction
The user who releases the invoice can adjust the working time booked on the tickets up or down. This increases or decreases the revenue generated with the respective ticket.

There are several scenarios that justify adjusting the billed time:
- Increasing to the estimated time: In this case, for example, it might make sense to bill the originally scheduled 12 hours instead of the 10.75 hours actually worked, if that was agreed with the customer.
- Reducing the hours: If you want to charge less as a goodwill gesture, the hours can also be reduced.
Any changes to the ticket times are reflected in the Additional column. In the screenshot, for example, 1h 15 minutes are billed additionally to the booked 10h 45 minutes for the ticket – a total of 12 hours.
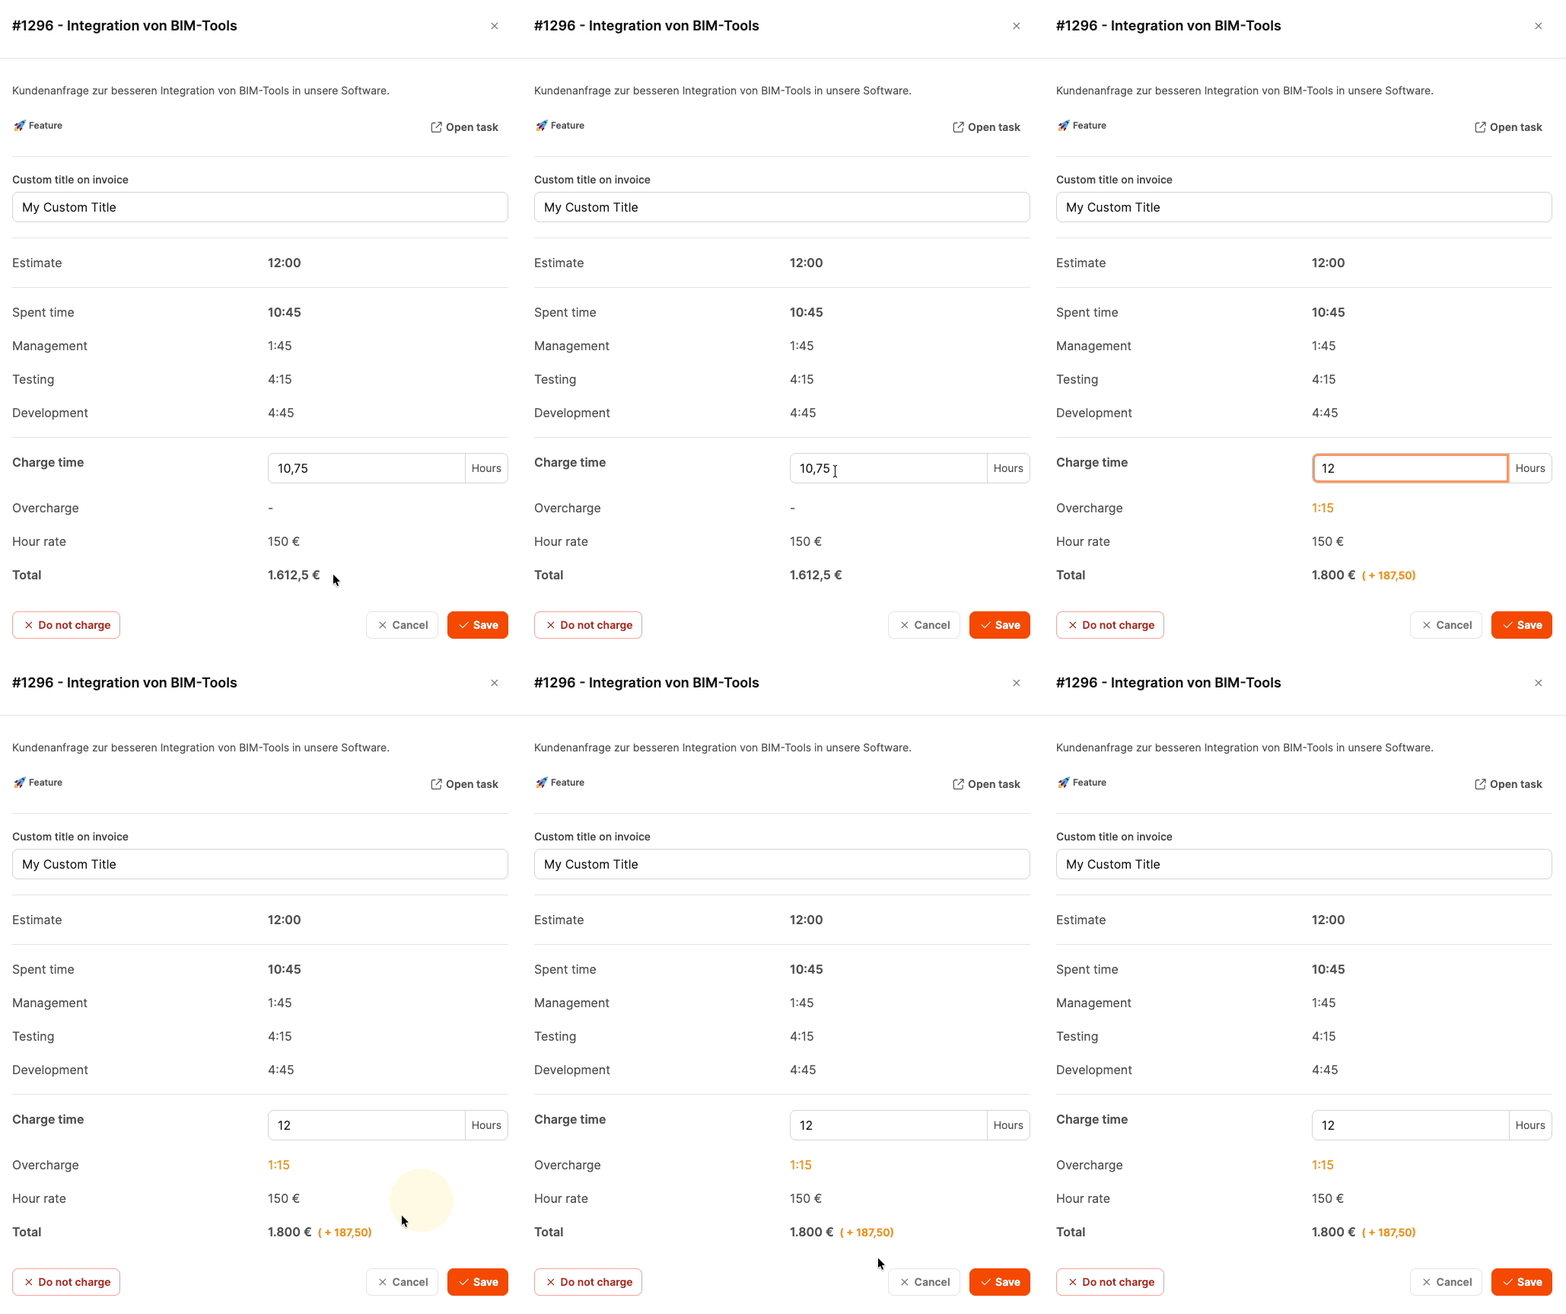
The adjustment can be made either directly in the dialog or more quickly using the plus and minus buttons in the task list.
Example:
- Time spent: 10.75 hours
- Actually billed: 12 hours
- Hourly rate: 100 EUR
- Total cost: 1,200 EUR (with a deviation of +1 hours).
Don’t bill
If a ticket should not be billed for certain reasons, it can be excluded using the “Don’t bill” option.
Finalizing the invoice
Once all adjustments have been made, the draft invoice can be released. This is done using the “Bill” button at the top right of the page. The draft invoice then disappears from the list and the invoice appears in the “Receivables” section.
With the final approval, the ticket is considered settled and can no longer be changed.